| Home - Downloads - Docs - Hardware - Source - News - Blog | |
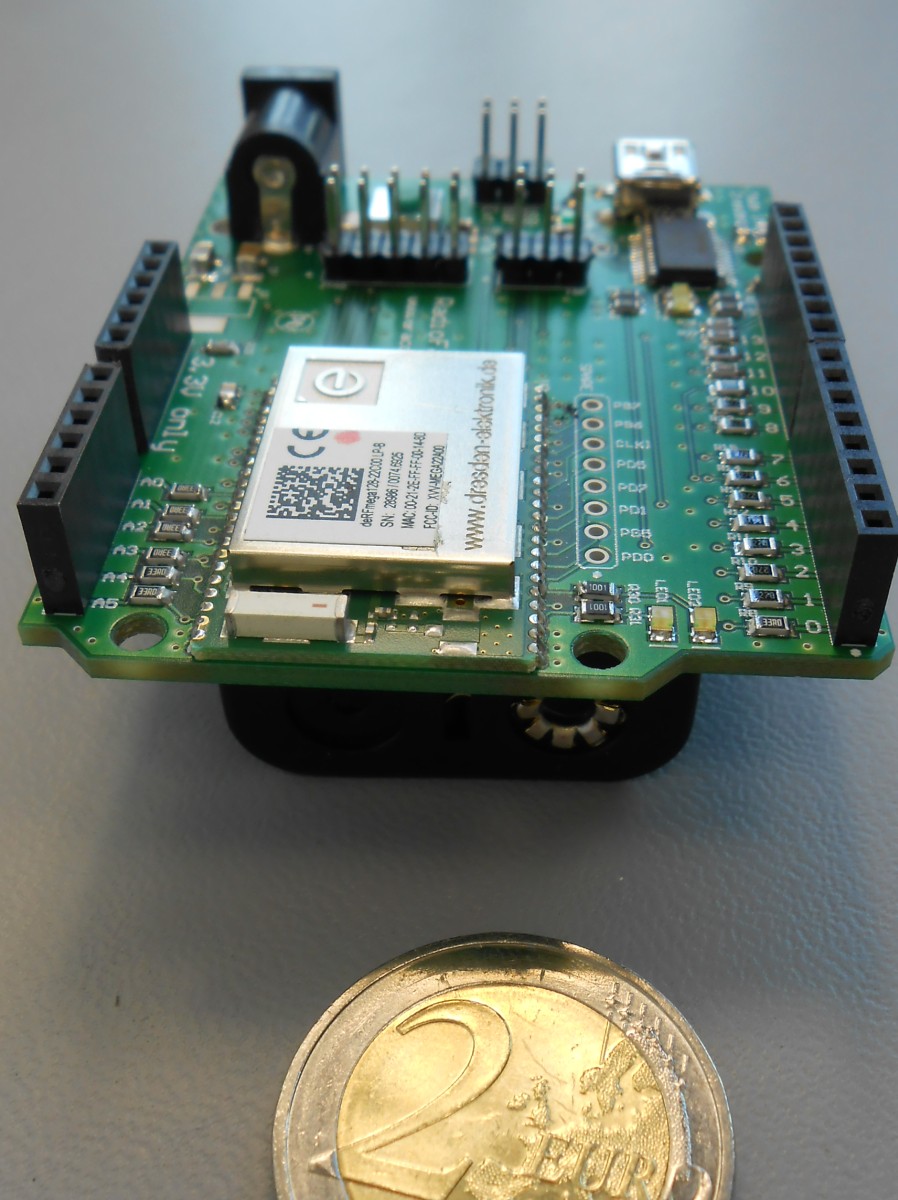
Radiofaro[span.] el faro - [engl.] beacon - [ger.] der Leuchtturm Radiofaro is an Arduino footprint compatible board with the Atmel single chip transceiver ATmega128RFA1. It replaces the original AVR ATmega328P, thus enabling wireless communication in a IEEE802.15.4 network. All special function pins of the original AVR are translated to the new controller which makes it possible to use existing shields without changing the enviroment.
HardwareRadiofaro PIN Assignment
Resources
Most of the components can be ordered from the german distributor reichelt elektronik GmbH & Co. KG . This is the link to the public shopping cart. The ATmega128RFA1 radio modules are available from dresden elektronik ingenieurtechnik gmbh. Per default the module deRFmega128-22C00 with the ceramic chip antenna is used. Optionally it can be replaced with the U.FL variant deRFmega128-22C02. Arduino Software SetupThe current Arduino IDE can be downloaded from http://arduino.cc/en/Main/Software. The installation of the IDE is described here. There are two versions of the Arduino IDE available, 1.0.x and and 1.5.x. For each version a µracoli support package is provided.
Using version 1.5.x is recommended, because this package comes with a more recent toolchain, which supports ATmega128RFA1. If version 1.0.x shall be used for some reason, a toolchain upgrade is required. The µracoli-support package can be downloaded here. There are two options to install the µracoli-support package, either
Central InstallationThe µracoli support package needs to be unzipped directly in the IDE directory After unpacking the Zipfile there are new directories in the Arduino directory Personal InstallationAfter installation of the Arduino-IDE, you need to find the location of the sketchbook folder. Open the Arduino-IDE, in the menu File / Preferences a dialogue opens and you can see the location of the sketchbook folder. 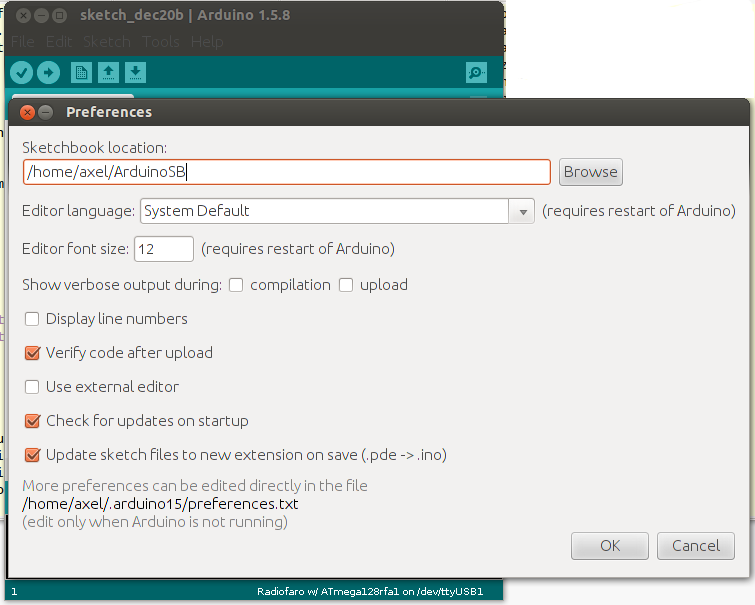
Change to the sketchbook location and unpack the µracoli support package in this directory. Tool Chain UpgradeA tool chain upgrade is just needed, if Arduino version 1.0.x shall be used, for 1.5.x changing the tool chain is not needed. Windows
This article describes on method to upgrade the tool chain inside the Arduino-IDE Arduino Full Memory: upgrade to the last ATMEL Toolchain version Linux
Usually the standard packages of the Linux distribution are sufficient. You can install them with: Since we move the standard Arduino toolchain out of the way, Arduino searches the tools in $PATH. Alternatively you can use a dedicated toolchain, e.g. the latest and greatest AVR toolchain (after registration at www.atmel.com), you have to do the following steps: MacOS
For MacOS a short description of the tool chain update can be found here: http://lists.nongnu.org/archive/html/uracoli-devel/2010-10/msg00002.html. This update is based on the CrossPack for AVR Development. Bootloader InstallationFor the initial firmware installation, an external ISP or JTAG programmer like AVR-ISP, Atmel Dragon or Atmel JTAG-ICE MkII is needed. This fuse settings set the bootloader size to 2kByte and the clock to 8MHz internal RC oscillator. After a reset, the MCU executes the code in the bootloader section and proceeds with execution of the application programm if within a timeout no programmer command is sent via the serial line. After connecting the Radiofaro board via USB, the assigned serial port name must be found. Under Linux the following command will show, that /dev/ttyUSB0 is assigned to the connected board: The correct function of the bootloader can be checked either via the Arduino-IDE when flashing a sketch or with the following command. |
more topics |
| Last modified: 2017-06-04 |