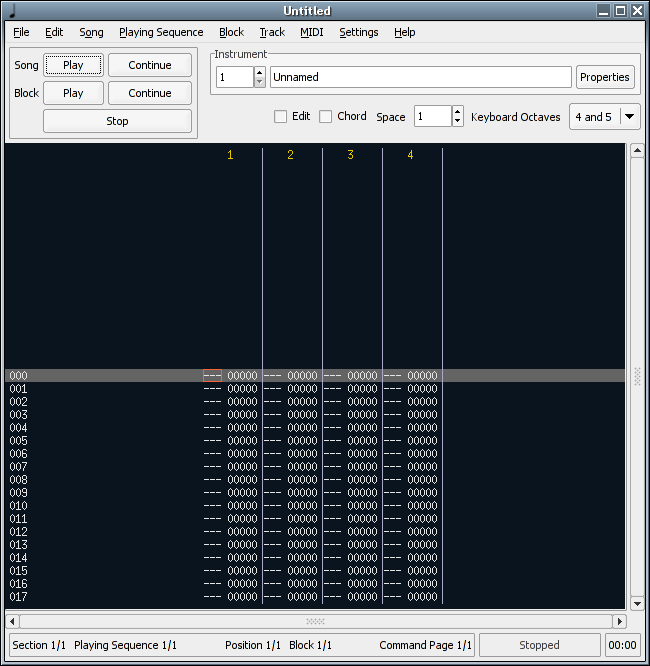
 The main window contains the primary controls of Tutka.
In Tutka songs are made of blocks. These blocks can be played in any order to form a complete song by placing them in a playing sequence. Blocks can be created and deleted and their properties can be edited using the Block List window. The Block List window can be opened by selecting List from the Block menu or by clicking the Block label in the bottom right part of the main window. The Block List window can also be used to select the currently visible and editable block.
Each block represents a certain period in time - a part of the song. This time period is further divided into lines that are represented vertically. A block begins from the top and ends at the bottom. All contents of a line are played simultaneously. If the playing speed is not varied each line is equal in length. There may be any number of lines in a block. The number of lines in a block can be changed using the Block List window.
Horizontally blocks are divided into tracks. Multiple tracks allow multiple notes on the same line because only one note can be played on one track at a time. Each track has room for one note and one or more commands on each of the block's lines. There may be any number of tracks in a block. The number of tracks in a block can be changed using the Block List window.
Each track has a global master volume between 0 (minimum) and 127 (maximum). It can be used to change the volume of a track in the entire song. Tracks can also be muted so that their contents will not be played. These settings can be set using the Track Volumes window. The Track Volumes window can be opened by selecting Track Volumes from the Song menu.
Each note is played using an instrument. Each instrument can have properties such as name, MIDI interface, MIDI channel, default volume, hold time and so on. Instruments are numbered from from 1 to 9 and from A to Z. The currently active instrument is shown in the top right part of the main window. It is used when playing or adding notes into blocks using the keyboard. The active instrument can be selected using the numeric keypad keys so that the Num Lock key activates instrument 1, the divide key activates instrument 2 and so on. The previous or the next instrument can be activated also by pressing the Control key and the left or right cursor keys, respectively, at the same time. The active instrument can be edited using the Instrument Properties window which can be opened using the Properties button in the top right part of the main window.
Notes can be played and entered using the keyboard. The keyboard is divided into two octaves. The keys ZSXDCVGBHNJM represent the notes of the lower one of the two octaves and the keys Q2W3ER5T6Y7U represent the upper one. The octaves in question can be selected using the function keys or by using the Keyboard Octaves selector in the main window. The notes will be played using the currently active instrument.
The current block is shown in the main part of the main window. The cursor marks the spot being edited. The cursor keys can be used to move the cursor around in a block. The line on which the cursor is highlighted. On each track there are six possible cursor positions: the note position, the instrument position, two command positions and two command value positions.
When the cursor is in a note position the keyboard can be used to play notes using the current instrument. If the Edit checkbox is marked the note played is also placed in the current cursor position and the cursor is moved downwards the number of lines selected using the Space selector in the main window. The Edit checkbox can be checked and unchecked using the Space key.
When the cursor is in an instrument position the keyboard keys 0-9 and A-Z can be used to select the instrument using which the note in the note position will be played.
When the cursor is in an command or command value position the keyboard keys 0-9 and A-F can be used to enter the command to be used in the particular line and track of the block.
Commands control things like volume, aftertouch, pitch bending and delays of notes on the track they are placed on. Some commands, such as the tempo command, affect the playback regardless of which track they are placed on. MIDI controllers can also be controlled. Commands are placed on tracks on the right side of the notes.
Commands consist of two byte-sized integers in hexadecimal representation. The first byte (integer) is the command number. The second byte (integer) is the value to be given to the command. Command numbers 00-7F are reserved for Tutka's commands; command numbers 80-FF represent MIDI controllers 0-127 so that MIDI controller number is the command number minus 80.
Most commands (and all MIDI controller commands) have a value range of 00-7F due to the precision defined in the MIDI protocol. In such commands values 80-FF can be used to slide the value from the last value to the defined value minus 80 during the line the command is on.
Each block can have multiple command pages. This allows multiple commands to be placed on the same line on the same track. The active command page is shown on the lower right corner of the main window. The next command page can be activated by pressing the Control key and the Tab key simultaneously. The number of command pages in a block can be changed using the Block List window.
| Command number | Short description | Value range |
|---|---|---|
| 00 | Set/slide value of previously used command | 00-7F (slide 80-FF) |
| 01 | Set/slide pitch wheel | 00-7F (slide 80-FF) |
| 02 | End block, set line | 00-FF |
| 03 | Set playing sequence position | 00-FF |
| 07 | Send program change | 00-7F |
| 08 | Send System Exclusive message | 00-FF |
| 09 | Set hold value | 00-FF |
| 0A | Retrigger note | 00-FF |
| 0B | Note delay | 00-FF |
| 0C | Velocity/aftertouch/note off | 00-7F (slide 80-FF) |
| 0D | Set channel pressure | 00-7F (slide 80-FF) |
| 0E | Set ticks per line/Stop | 00-FF |
| 0F | Set tempo/Stop | 00-FF |
| 80-FF | Set/slide MIDI controller value | 00-7F (slide 80-FF) |
The playing sequence is used to define in which order the blocks are to be played. The same block can be played many times or may not be played at all if it is used for testing or editing purposes. The playing sequence can be edited using the Playing Sequence window which can be opened by clicking the Playing Sequence button in the bottom middle part of the main window.
For defining the structure of the song even more the song can be constructed from multiple playing sequences that can be played in any order. Playing sequences can be created using the Playing Sequence window and can then be placed in the section list for determining their playing order. The section list can be considered to be the playing sequence of playing sequences. The section list can be edited using the Section List window which can be opened using the Section List button in the bottom left part of the main window.
The main window contains the primary controls of Tutka.
The playback controls are in the top left corner. The buttons can be used to play the song from the beginning, to continue playing the song from the current position, to play the current block from the beginning, to continue playing the current block from the current position and to stop playback.
The Instrument section in the top right corner contains the selector for current instrument. The spin button can be used to select the instrument to use for editing. The text field shows the name of the current instrument. The Properties button opens the Instrument properties dialog which can be used to edit the properties of the current instrument.
Below the Instrument section are some miscellaneous toggles and settings used while editing.
The middle part of the main window contains a tracker view that displays one block of the song at a time. This is where all actual editing is done.
The bottom part contains a status bar that shows the currently active section, playing sequence, playing sequence position, block and command page. The Section, Playing Sequence, Position and Block labels can also be clicked to open the Section list, Playing sequence list, Playing sequence and Block list windows, respectively. There are also two separate status fields for the current playing status and current playing time.
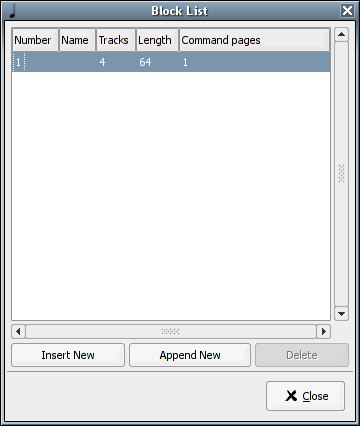 The Block list window can be used to select the current block, create new
blocks, delete existing blocks and change the properties of the blocks.
The Block list window can be used to select the current block, create new
blocks, delete existing blocks and change the properties of the blocks.
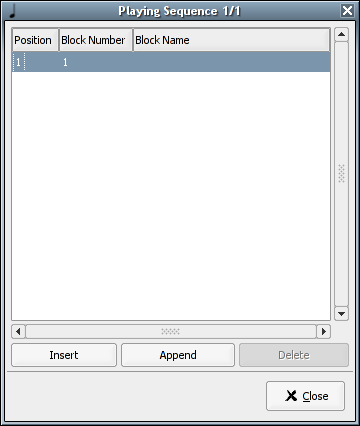 The Playing sequence window can be used to select the current position in the
current playing sequence, insert new positions, delete existing positions and
change the block to be played in different playing sequence positions.
The Playing sequence window can be used to select the current position in the
current playing sequence, insert new positions, delete existing positions and
change the block to be played in different playing sequence positions.
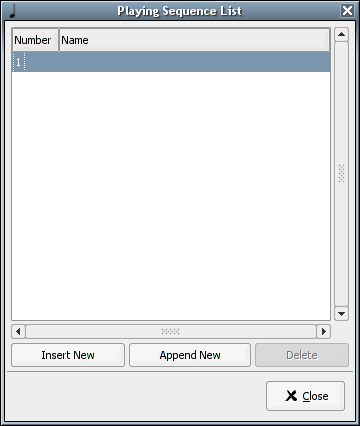 The Playing sequence list window can be used to select the current playing
sequence, insert new playing sequences, delete existing playing sequences and
change the name of the current playing sequence.
The Playing sequence list window can be used to select the current playing
sequence, insert new playing sequences, delete existing playing sequences and
change the name of the current playing sequence.
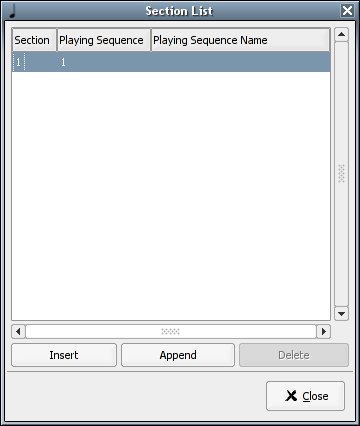 The Section list window can be used to select the current section, insert new
sections, delete existing sections and change the playing sequence to be played
in different sections.
The Section list window can be used to select the current section, insert new
sections, delete existing sections and change the playing sequence to be played
in different sections.
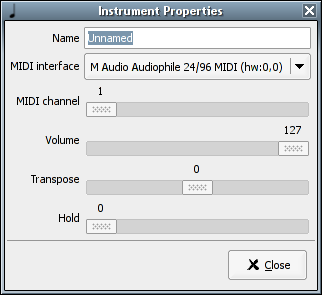 The Instrument properties window can be used to change the name, MIDI
interface, MIDI channel, volume, transpose and hold of the current instrument.
The Instrument properties window can be used to change the name, MIDI
interface, MIDI channel, volume, transpose and hold of the current instrument.
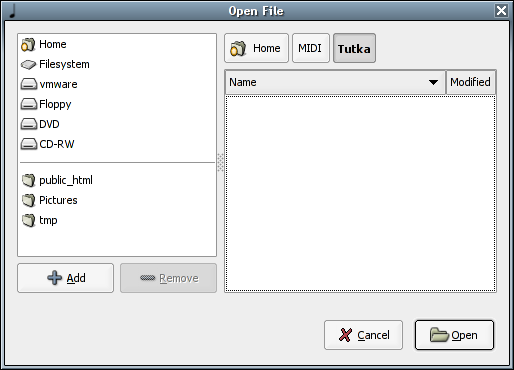 The Open file dialog can be used to load a Tutka XML file or an MMD song.
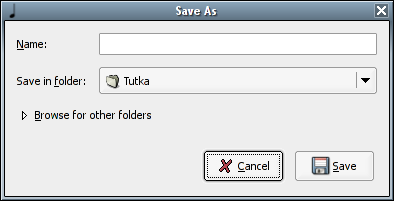 The Save as dialog can be used to save the current song as a Tutka XML file,
as an MMD song or as an SMF (MIDI) file. The file format depends on the file
extension:
The Save as dialog can be used to save the current song as a Tutka XML file,
as an MMD song or as an SMF (MIDI) file. The file format depends on the file
extension: .med, .mmd and .mmd2 save as
an MMD file, .mid saves as an SMF file and other extensions save
in Tutka format.
![]() The Transpose dialog can be used to transpose a part of the song. The area to
transpose can be entire song, current block, current track or selection. You
can select whether to transpose all instrument in the area or just the current
instrument. The notes can be tranposed octave up, octave down, halfnote up or
halfnote down.
The Transpose dialog can be used to transpose a part of the song. The area to
transpose can be entire song, current block, current track or selection. You
can select whether to transpose all instrument in the area or just the current
instrument. The notes can be tranposed octave up, octave down, halfnote up or
halfnote down.
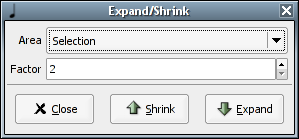 The Expand/Shrink dialog can be used to expand or shrink a part of the song.
Expanding means adding empty lines between existing lines. Shrinking means
removing lines between lines. Expand/Shrink does NOT change the length of the
block so before expanding make sure that there is enough space for all notes to
fit. The area to expand/shrink can be entire song, current block, current track
or selection. You can select how many lines to add between each line (expand)
or how many lines two delete after each line (shrink).
The Expand/Shrink dialog can be used to expand or shrink a part of the song.
Expanding means adding empty lines between existing lines. Shrinking means
removing lines between lines. Expand/Shrink does NOT change the length of the
block so before expanding make sure that there is enough space for all notes to
fit. The area to expand/shrink can be entire song, current block, current track
or selection. You can select how many lines to add between each line (expand)
or how many lines two delete after each line (shrink).
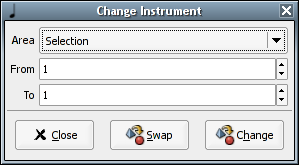 The Change instrument dialog can be used to change an instrument to another in
a part of the song. The area for changing instruments on can be entire song,
current block, current track or selection. From and To fields are
used to select the instrument number to change and the instrument number to
change to. You can also swap instruments instead changing using the Swap
button.
The Change instrument dialog can be used to change an instrument to another in
a part of the song. The area for changing instruments on can be entire song,
current block, current track or selection. From and To fields are
used to select the instrument number to change and the instrument number to
change to. You can also swap instruments instead changing using the Swap
button.
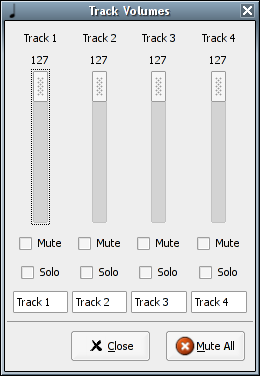 The Track volumes dialog is used to set the default volume of each track. All
volumes are from 0 to 127. Tracks can also be muted: muted tracks are not
played. Tracks can also be soloed. If tracks are soloed the tracks that are
not soloed are not played. Descriptive names can also be added to tracks.
The Track volumes dialog is used to set the default volume of each track. All
volumes are from 0 to 127. Tracks can also be muted: muted tracks are not
played. Tracks can also be soloed. If tracks are soloed the tracks that are
not soloed are not played. Descriptive names can also be added to tracks.
Note that the number of tracks displayed in the track volumes dialog is the maximum number of tracks in the current song. If the maximum number of tracks in the current song decreases tracks are removed from the Track volumes dialog and their names are lost.
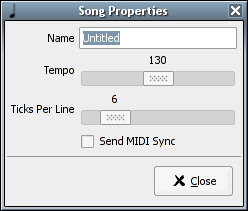 The Song properties dialog is used to set the name and tempo of the current
song. The Tempo slider sets the tempo of the song in beats per minute.
The Ticks per line slider sets how many MIDI ticks each tracker line
represents. In MIDI a quarter (1/4) note is 24 ticks long, so the default
value, 6 ticks, means that each line represents a 1/16 note.
The Song properties dialog is used to set the name and tempo of the current
song. The Tempo slider sets the tempo of the song in beats per minute.
The Ticks per line slider sets how many MIDI ticks each tracker line
represents. In MIDI a quarter (1/4) note is 24 ticks long, so the default
value, 6 ticks, means that each line represents a 1/16 note.
 The Message list dialog allows you to create, delete, send, receive, load and
save MIDI messages, set their names and lengths and determine whether they
should be automatically sent after loading. Before MIDI messages can be sent,
received, loaded or saved or before their properties can be changed they must
be created.
The Message list dialog allows you to create, delete, send, receive, load and
save MIDI messages, set their names and lengths and determine whether they
should be automatically sent after loading. Before MIDI messages can be sent,
received, loaded or saved or before their properties can be changed they must
be created.
 The Load message dialog can be used to load a raw MIDI message from a file as
the currently selected message.
The Load message dialog can be used to load a raw MIDI message from a file as
the currently selected message.
 The Save message dialog can be used to save the currently selected message to
a file as a raw MIDI message.
The Save message dialog can be used to save the currently selected message to
a file as a raw MIDI message.
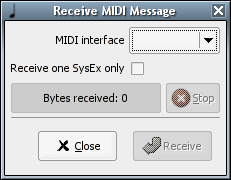 This dialog allows you to receive a MIDI message to the currently selected
message.
This dialog allows you to receive a MIDI message to the currently selected
message.
The MIDI interface combo box shows all MIDI interfaces that are enabled for input in the preferences. At least one MIDI interface must be enabled for input to receive a MIDI message.
Receiving can be started using the Receive button. It can be stopped using the Stop button.
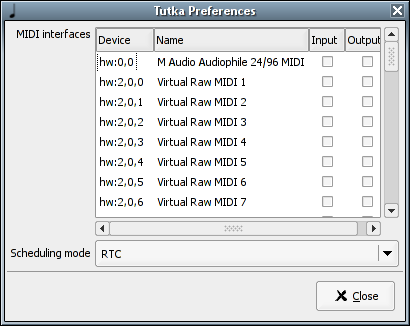 The MIDI interfaces list allows you to select which of the available
MIDI interfaces are to be used for input and which for output. If a MIDI
interface is not enabled for output notes sent to it using an instrument that
has the MIDI interface defined are not played. If a MIDI interface is not
enabled for input MIDI messages can not be received through the interface and
the interface is not used for receiving notes.
The MIDI interfaces list allows you to select which of the available
MIDI interfaces are to be used for input and which for output. If a MIDI
interface is not enabled for output notes sent to it using an instrument that
has the MIDI interface defined are not played. If a MIDI interface is not
enabled for input MIDI messages can not be received through the interface and
the interface is not used for receiving notes.
The Scheduling mode is used to control how Tutka schedules the player.
RTC is currently the most accurate method but may require the system
administrator to give the user rights to use at least a 512 Hz RTC timer by
running sysctl dev.rtc.max-user-freq to 512. The other option is
Nanosleep which is not very accurate.
If RTC timing is selected Tutka tries to use a 2048 Hz timer if available. If it fails it tries 1024 Hz and 512 Hz and if neither of those are available it falls back to the Nanosleep method. Another thing worth noting is that even a 2048 Hz timer is not precise enough so Tutka busy loops until the very exact moment. This causes a slight CPU load while Tutka is playing.
Elevated privileges and priorities can enhance timing accuracy.
 This dialog displays information about the version of Tutka you are running.
 This dialog allows you to quit Tutka by clicking on Quit. Click Cancel to
cancel.
This dialog allows you to quit Tutka by clicking on Quit. Click Cancel to
cancel.
| Key (combination) | Command description |
|---|---|
| Cursor up | Move cursor one line up |
| Cursor down | Move cursor one line down |
| Cursor left | Move cursor one position left |
| Cursor right | Move cursor one position right |
| Home | Move cursor to first line |
| End | Move cursor to last line |
| Page up | Move cursor 8 lines up |
| Page down | Move cursor 8 lines down |
| Space | Stop, toggle edit mode on/off |
| Tab | Move cursor to next track |
| Shift+Tab | Move cursor to previous track |
| Ctrl+Shift+Tab | Next command page |
| F1-F9 | Select keyboard octaves |
| Backspace | Delete current line (current track) |
| Shift+Backspace | Insert line (current track) |
| Alt+Backspace | Delete current line |
| Alt+Shift+Backspace | Insert line |
| Del | Clear current note |
| Shift+Del | Clear current note and commands |
| Ctrl+Del | Clear current commands |
| Ctrl+B | Selection mode on/off |
| Ctrl+K | Clear to the end of track |
| Ctrl+N | New song |
| Ctrl+O | Open song |
| Ctrl+S | Save song |
| Shift+Ctrl+S | Save song as |
| Ctrl+P | Print song |
| Ctrl+Q | Quit |
| Ctrl+X | Cut selection |
| Ctrl+C | Copy selection |
| Ctrl+V | Paste selection |
| Ctrl+F3 | Cut block |
| Ctrl+F4 | Copy block |
| Ctrl+F5 | Paste block |
| Shift+F3 | Cut track |
| Shift+F4 | Copy track |
| Shift+F5 | Paste track |
| Ctrl+0-9 | Set space value |
| Shift+Cursor left | Previous playing sequence position |
| Shift+Cursor right | Next playing sequence position |
| Alt+Cursor left | Previous block |
| Alt+Cursor right | Next block |
| Ctrl+Cursor left | Previous instrument |
| Ctrl+Cursor right | Next instrument |
| Alt+1-9 | Mute tracks |
| Ctrl+Alt+1-9 | Solo tracks |
| Right Shift | Play block |
| Right Ctrl | Play song |
This is a step by step guide for writing a song using Tutka.
The first thing to do is to set up the MIDI devices to be used correctly. This involves changing the settings of the MIDI devices. Each MIDI instrument that is going to be used should be assigned an unique MIDI channel. After this the Tutka instruments should be edited so that they reflect the selected MIDI instruments. An appropriate MIDI channel should be chosen for each Tutka instrument so that all MIDI instruments can be played using different Tutka instruments.
If the MIDI devices are not able to store the selected MIDI instrument setup they can probably send the setup using SysEx. Tutka can receive such SysEx messages and they can be sent back to the devices to restore the setup. This can be achieved using the Message List window.
After the setup is done, composing can begin. One of the first things to do is to choose a tempo for the song. This can be done using the Song Properties window. The tempo is defined in beats per minute. In addition to this it's possible to choose how many MIDI ticks each line in the tracker represents. If the song is not going to have shorter than 1/16 notes in it, the default value, 6, is usually appropriate. If, for example, 1/32 notes are needed, the Ticks per line value can be changed to 3 for more fine grained control.
The number of tracks can be chosen for each block separately. It's usually good, however, to dedicate tracks for different purposes so that they're used consistently throughout the whole song. It should also be kept in mind that each track can play only one note at a time. This means thinking of the track structure a bit. For example, one could allocate track 1 to be used for the bass drum, track 2 for the snare drum and track 3 for the hi-hats. This way the different drums can always be found from the same track regardless of which block is being edited. This also allows naming the tracks appropriately in the Track Volumes window.
Tracker songs are usually composed one block at a time. Each block represents a part of the song. The length one each block can be chosen to suit the needs. It's usually convenient to keep the blocks relatively short so that if the same block is to be repeated, it can be reused without having to create an another block with almost the same content. After choosing an appropriate length, notes and related commands can be entered in the block. The block can be played back and edited until it's satisfactory.
When one block is ready, an another one can be created. The new block can continue from where the previous one left off or can be a completely separate block. The order in which the blocks are made does not have to correspond to the order in which they're going to be played back in the final song, so there no reason not to create blocks for the main ideas of the song first before going into details and parts in between.
When an appropriate number of parts of the song have been written into blocks it's time to choose the order in which the blocks are played back when the entire song is played. This is done by creating a playing sequence using the Playing Sequence window, which can be opened by clicking on the Position label on the bottom of the main window. When the entire song is played back the blocks are played back in the order defined in the playing sequence. The same block can be played back multiple times.
Sometimes it's feasible to play longer parts of the song, consisting of multiple blocks, multiple times. To avoid having to define these block sequences multiple times in the playing sequence, several playing sequences can be defined. For example, a song could have an intro, a verse and a chorus, of which the verse and the chorus are repeated twice. Each of these three parts can be defined as a separate playing sequence using the Playing Sequence List window and then the playing order of these playing sequences can be defined using the Section List window.