The Canvas
Introduction
When you have created a nice and powerful script to generate a 3D structure, you will most likely want to visually inspect that you have indeed created that what you intended. Usually you even will want or need to see intermediate results before you can continue your development. For this purpose the GUI offers a canvas where structures can be drawn by functions called from a script and interactively be manipulated by menus options and toolbar buttons.
The 3D drawing and rendering functionality is based on OpenGL. Therefore you will need to have OpenGL available on your machine, either in hardware or software. Hardware accelerated OpenGL will of course speed up and ease operations.
The drawing canvas of actually is not a single canvas, but can be split up into multiple viewports. They can be used individually for drawing different items, but can also be linked together to show different views of the same scene. The details about using multiple viewports are described in section Multiple viewports. The remainder of this chapter will treat the canvas as if it was a single viewport.
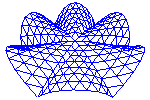
distinguishes three types of items that can be drawn on the canvas: actors, marks and decorations. The most important class are the actors: these are 3D geometrical structures defined in the global world coordinates. The 3D scene formed by the actors is viewed by a camera from a certain position, with a certain orientation and lens. The result as viewed by the camera is shown on the canvas. The scripting language and the GUI provide ample means to move the camera and change the lens settings, allowing translation, rotation, zooming, changing perspective. All the user needs to do to get an actor displayed with the current camera settings, is to add that actor to the scene. There are different types of actors available, but the most important is the FormexActor: a graphical representation of a Formex. It is so important that there is a special function with lots of options to create a FormexActor and add it to the OpenGL scene. This function, draw(), will be explained in detail in the next section.
The second type of canvas items, marks, differ from the actors in that only their position in world coordinates is fixed, but not their orientation. Marks are always drawn in the same way, irrespective of the camera settings. The observer will always have the same view of the item, though it can (and will) move over the canvas when the camera is changed. Marks are primarily used to attach fixed attributes to certain points of the actors, e.g. a big dot, or a text dispaying some identification of the point.
Finally, offers decorations, which are items drawn in 2D viewport coordinates and unchangeably attached to the viewport. This can e.g. be used to display text or color legends on the view.
Drawing a Formex
The most important action performed on the canvas is the drawing of a Formex.
This is accomplished with the draw() function. If you look at the reference page
of the draw() function, the number of arguments looks frightening.
However, most of these arguments have sensible default values, making the access
to drawing functionality easy even for beginners. To display your created Formex
F on the screen, a simple draw(F) will suffice in many cases.
If you draw several Formices with subsequent draw() commands, they will clutter the view. You can use the clear() instruction to wipe out the screen before drawing the next one. If you want to see them together in the same view, you can use different colors to differentiate. Color drawing is as easy as draw(F,color=’red’). The color specification can take various forms. It can be a single color or an array of colors or even an array of indices in a color table. In the latter case you use draw(F,color=indices,colormap=table) to draw the Formex. If multiple colors are specified, each elementof the Formex will be drawn with the corresponding color, and if the color array (or the color indices array) has less entries than the number of elements, it is wrapped around.
A single color entry can be specified by a string (‘red’) or by a triple of RGB values in the range 0.0..1.0 (e.g. red is (1.0,0.0,0.0)) or a triplet of integer values in the range 0..255 or a hexadecimal string (‘#FF0000’) or generally any of the values that can be converted by the colors.glColor() function to a triplet of RGB values.
If no color is specified and your Formex has no properties, will draw it with the current drawing color. If the Formex has properties, will use the properies as a color index into the specified color map or a (configurable) default color map.
There should be some examples here. Draw object(s) with specified settings and direct camera to it.
Viewing the scene
Once the Formex is drawn, you can manipulate it interactively using the mouse: you can rotate, translate and zoom with any of the methods decribed in Mouse interactions on the canvas. You should understand though that these methods do not change your Formex, but only how it is viewed by the observer.
Our drawing board is based on OpenGL. The whole OpenGL drawing/viewing process can best be understood by making the comparison with the set of a movie, in which actors appear in a 3D scene, and a camera that creates a 2D image by looking at the scene with a certain lens from some angle and distance. Drawing a Formex then is nothing more than making an actor appear on the scene. The OpenGL machine will render it according to the current camera settings.
Viewing transformations using the mouse will only affect the camera, but not the scene. Thus, if you move the Formex by sliding your mouse with button 3 depressed to the right, the Formex will look like it is moving to the right, though it is actually not: we simply move the camera in the opposite direction. Therefore in perspective mode, you will notice that moving the scene will not just translate the picture: its shape will change too, because of the changing perspective.
Using a camera, there are two ways of zooming: either by changing the focal length of the lens (lens zooming) or by moving the camera towards or away from the scene (dolly zooming). The first one will change the perspective view of the scene, while the second one will not.
The easiest way to set all camera parameters for properly viewing a scene is by justing telling the direction from which you want to look, and let the program determine the rest of the settings itself. even goes a step further and has a number of built in directions readily available: ‘top’, ‘bottom’, ‘left’, ‘right’, ‘front’, ‘back’ will set up the camera looking from that direction.
Multiple viewports
Drawing in is not limited to a single canvas. You can create any number of canvas widgets laid out in an array with given number of rows or columns. The following functions are available for manipulating the viewports.
-
layout(nvps=None, ncols=None, nrows=None)¶ Set the viewports layout. You can specify the number of viewports and the number of columns or rows.
If a number of viewports is given, viewports will be added or removed to match the number requested. By default they are layed out rowwise over two columns.
If ncols is an int, viewports are laid out rowwise over ncols columns and nrows is ignored. If ncols is None and nrows is an int, viewports are laid out columnwise over nrows rows.
-
addViewport()¶ Add a new viewport.
-
removeViewport()¶ Remove the last viewport.
-
linkViewport(vp, tovp)¶ Link viewport vp to viewport tovp.
Both vp and tovp should be numbers of viewports. The viewport vp will now show the same contents as the viewport tovp.
-
viewport(n) Select the current viewport. All drawing related functions will henceforth operate on that viewport.
This action is also implicitly called by clicking with the mouse inside a viewport.