The Graphical User Interface
While the GUI has become much more elaborate in recent versions, its intention will never be to provide a fully interactive environment to operate on geometrical data. The main purpose of pyFormex will always remain to provide a framework for easily creating scripts to operate on geometries. Automization of otherwise tedious tasks is our primary focus.
The GUI mainly serves the following purposes:
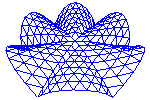
- Display a structure in 3D. This includes changing the viewpoint, orientation and viewing distance. Thus you can interactively rotate, translate, zoom.
- Save a view in one of the supported image formats. Most of the images in this manual and on the website were created that way.
- Changing settings (though not everything can be changed through the GUI yet).
- Running scripts, possibly starting other programs and display their results.
- Interactively construct, select, change, import or export geometrical structures.
Unlike with most other geometrical modelers, in you usually design a geometrical model by writing a small script with the mathematical expressions needed to generate it. Any text editor will be suitable for this purpose. The main author of uses GNU Emacs, but this is just a personal preference. Any modern text editor will be fine, and the one you are accustomed with, will probably be the best choice. Since Python is the language used in scripts, a Python aware editor is highly preferable. It will highlight the syntax and help you with proper alignment (which is very important in Python). The default editors of KDE and Gnome and most other modern editors will certainly do well. A special purpose editor integrated into the GUI is on our TODO list, but it certainly is not our top priority, because general purpose editors are already adequate for our purposes.
Learning how to use is best done by studying and changing some of the examples. We suggest that you first take a look at the examples included in the GUI and select those that display geometrical structures and/or use features that look interesting to you. Then you can study the source code of those examples and see how the structures got built and how the features were obtained. Depending on your installation and configuration, the examples can be found under the or main menu item. The examples may appear classified according to themes or keywords, which can help you in selecting appropriate examples.
Selecting an example from the menu will normally execute the script, possibly ask for some interactive input and display the resulting geometrical structure. To see the source of the script, choose the menu item.
Before starting to write your own scripts, you should probably get acquainted with the basic data structures and instructions of Python, NumPy and pyFormex. You can do this by reading the pyFormex tutorial.
Starting the GUI
You start the pyFormex GUI by entering the command pyformex in a
terminal window. Depending on your installation, you may also have a
panel or menu button on your desktop from which you can start the
graphical interface by a simple mouse click. When the main window
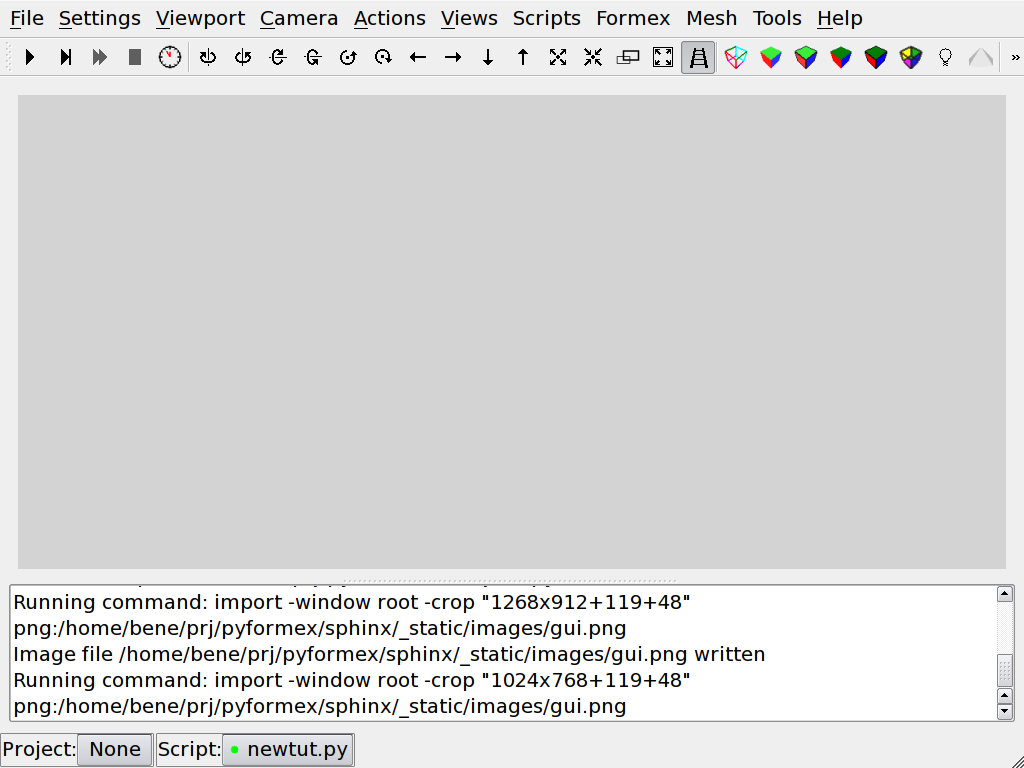
appears, it will look like the one shown in the figure
The pyFormex main window. Your window manager will most likely have put some
decorations around it, but these are very much OS and window manager
dependent and are therefore not shown in the figure.
Finally, you can also start the GUI with the instruction
startGUI() from a pyFormex script executed in non-GUI mode.
The pyFormex main window
Basic use of the GUI
As is still in its infancy, the GUI is subject to frequent changes and it would make no sense to cover here every single aspect of it. Rather we will describe the most important functions, so that users can quickly get used to working with. Also we will present some of the more obscure features that users may not expect but yet might be very useful.
The window (figure The pyFormex main window) comprises 5 parts. From top to bottom these are:
- the menu bar,
- the tool bar,
- the canvas (empty in the figure),
- the message board, and
- the status bar.
Many of these parts look and work in a rather familiar way. The menu bar gives access to most of the GUI features through a series of pull-down menus. The most import functions are described in following sections.
The toolbar contains a series of buttons that trigger actions when clicked upon. This provides an easier access to some frequently used functions, mainly for changing the viewing parameters.
The canvas is a drawing board where your scripts can show the created geometrical structures and provide them with full 3D view and manipulation functions. This is obviously the most important part of the GUI, and even the main reason for having a GUI at all. However, the contents of the canvas is often mainly created by calling drawing functions from a script. This part of the GUI is therefore treated in full detail in a separate chapter.
In the message board displays informative messages, requested results, possibly also errors and any text that your script writes out.
The status bar shows the current status of the GUI. For now this only contains the filename of the current script and an indicator if this file has been recognized as a script (happy face) or not (unhappy face).
Between the canvas and the message board is a splitter allowing resizing the parts of the window occupied by the canvas and message board. The mouse cursor changes to a vertical resizing symbol when you move over it. Just click on the splitter and move the mouse up or down to adjust the canvas/message board to your likings.
The main window can be resized in the usual ways.
Mouse interactions on the canvas
A number of actions can be performed by interacting with the mouse on the canvas. The default initial bindings of the mouse buttons are shown in the following table.
Rotate, pan and zoom
You can use the mouse to dynamically rotate, pan and zoom the scene displayed on the canvas. These actions are bound to the left, middle and right mouse buttons by default. Pressing the corresponding mouse button starts the action; moving the mouse with depressed button continuously performs the actions, until the button is released. During picking operations, the mouse bindings are changed. You can however still start the interactive rotate, pan and zoom, by holding down the ALT key modifier when pressing the mouse button.
- rotate
- Press the left mouse button, and while holding it down, move the mouse ove the canvas: the scene will rotate. Rotating in 3D by a 2D translation of the mouse is a fairly complex operation:
Moving the mouse radially with respect to the center of the screen rotates around an axis lying in the screen and perpendicular to the direction of the movement.
Moving tangentially rotates around an axis perpendicular to the screen (the screen z-axis), but only if the mouse was not too close to the center of the screen when the button was pressed.
Try it out on some examples to get a feeling of the workinhg of mouse rotation.
- pan
- Pressing the middle (or simultanuous left+right) mouse button and holding it down, will move the scene in the direction of the mouse movement. Because this is implemented as a movement of the camera in the opposite direction, the perspective of the scene may change during this operation.
- zoom
- Interactive zooming is performed by pressing the right mouse button and move the mouse while keeping the button depressed. The type of zoom action depends on the direction of the movement:
horizontal movement zooms by camera lens angle,
vertical movement zooms by changing camera distance.
The first mode keeps the perspective, the second changes it. Moving right and upzooms in, left and down zooms out. Moving diagonally from upper left to lower right more or less keeps the image size, while changing the perspective.
Interactive selection
During picking operations, the mouse button functionality is changed. Click and drag the left mouse button to create a rectangular selection region on the canvas. Depending on the modifier key that was used when pressing the button, the selected items will be:
- NONE
- set as the current selection;
- SHIFT
- added to the currentselection;
- CTRL
- removed from the current selection.
Clicking the right mouse button finishes the interactive selection mode.
During selection mode, using the mouse buttons in combination with the ALT modifier key will still activate the default mouse functions (rotate/pan/zoom).
Customizing the GUI
Some parts of the GUI can easily be customized by the user. The appearance (widget style and fonts) can be changed from the preferences menu. Custom menus can be added by executing a script. Both are very simple tasks even for beginning users. They are explained shortly hereafter.
Experienced users with a sufficient knowledge of Python and GUI building with Qt can of course use all their skills to tune every single aspect of the GUI according to their wishes. If you send us your modifications, we might even include them in the official distribution.