KImageMapEditor
[ Screenshots ]
[ License ]
[ Requirements ]
[ Download ]
[ Change Log ]
[ Compilation and Installation ]
[ Public Forum ]
[ Comments ? ]
[ Related Links ]
How to integrate KImageMapEditor into Quanta 2
KImageMapEditor since version 1.0b
Since version 1.0b you can use the plugin system of Quanta.
You need also at least version 3.0 of Quanta.
In Quanta go to plugins->edit. Then press the add button.
You will see something like this:
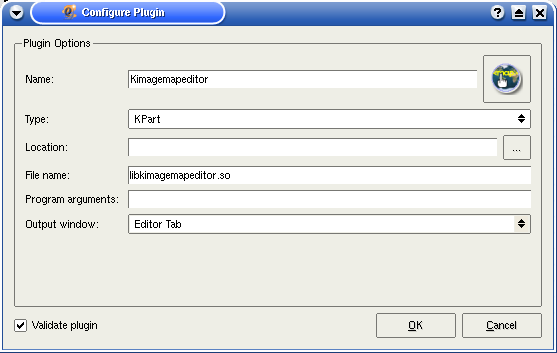
Fill out the entries like on the screenshot and you're done.
Please keep in mind, that the plugin system isn't tested very well yet.
If you have any crashes please write an email to me with the description
of the circumstances of the crash.
KImageMapEditor below version 1.0b
It's very easy to use KImageMapEditor within Quanta.
Since version 2 pre 2 you can define your own actions in Quanta.
Simply start Quanta , go to Settings->Configure Actions and follow the 7 Steps below :
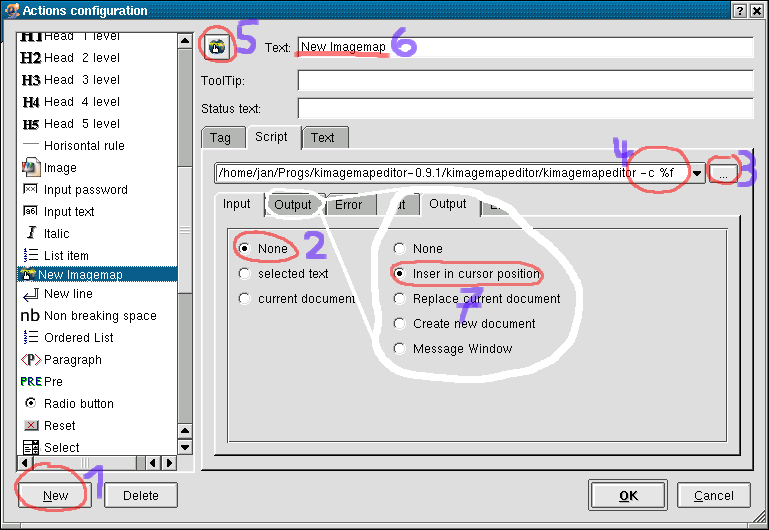
- First create a new action by clicking the New button
- Then select the input tab and pick the None option
- Now search for the KImageMapEditor executable file
- To say KImageMapEditor that it should generate the map to the standard output.
give it the option -c. The url to the current document is represented
by the %f option.
- Search the KImageMapEditor icon that should appear in the toolbar
- To get a tooltip enter a text here
- At last select the output tab and pick the Insert in cursor position option
Now finish by pressing OK.
To see the action on a toolbar you have to configure the toolbars under the Settings->Configure Toolbars
menu entry.