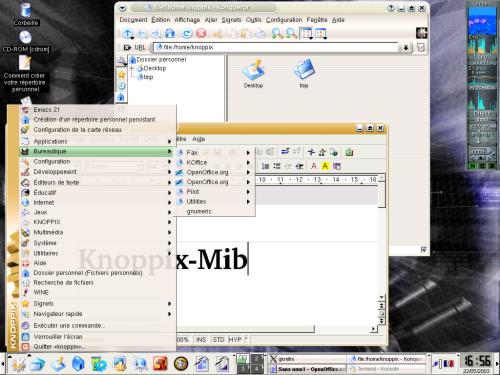
Knoppix-MiB screen / Écran de la Knoppix-MiB
ftp://ftp.free.fr/mirrors/knoppix-mib.org
ftp://ftp.crihan.fr/mirrors/knoppix-mib.org
http://ftp.crihan.fr/mirrors/knoppix-mib.org
ftp://ftp.uni-kl.de/pub/linux/knoppix-mib
ftp://ftp.samizdat.net/pub/knoppix-mib
ftp://download.vie-privee.org/lafil
See / Voir : http://www.bouissou.net (in french)
Knoppix-MiB screen / Écran de la Knoppix-MiB
_______________________________________________________________________________
License: The improvements and modifications I made on the Knoppix
distribution are licensed under the General Public License (GPL)
see http://www.gnu.org/licenses/gpl.html or the "gpl.txt" file in
the /KNOPPIX directory of this CD-Rom
Permission is granted to use, copy, and redistribute this software
freely, provided the terms of the GPL license are respected.
(More precisions: see at end of file)
ENGLISH VERSION
===============
Required computer configuration:
- PC-Compatible, AMD or Intel x86 family processor
- 128 MB RAM required for using the default KDE graphical environment
- The more RAM, the better ;-)
- 24X CD-Rom drive or faster
*** IMPORTANT NOTE ***
If you have created a persistent home directory using Knoppix 3.1 Privacy
Edition and want to use it on this version 3.2, you MUST rename the .knoppix
encrypted container that resides on your removable device to .knoppix.img
NOTE: Please note that, by default, this Knoppix CD will boot in FRENCH.
To have it boot in english or german, please type:
knoppix lang=en
or
knoppix lang=de
...at the first boot prompt
You can change the default boot language of the ISO image before burning it to
CD-Rom, by using the knxiso-setlang utility that you can download from:
http://homepage.hispeed.ch/py430/knoppix/knxiso-setlang
This utility uses the knoppix-customize utility, that you will need to download
as well, from:
ftp://ftp.uni-kl.de/pub/linux/knoppix-mib/knoppix-customize.c
Please note that boot prompt uses FRENCH AZERTY KEYBOARD LAYOUT, but this does
not affect keyboard layout used once booted (corresponding to chosen language).
Correspondance between major keys in french AZERTY and US QWERTY keyboards
is displayed on main boot screen to help non-french users to figure it out ;-)
_______________________________________________________________________________
This version of the Knoppix distribution has been produced to provide everybody
with a GNU/Linux Operating System contained on a bootable CD-Rom that can be
immediately used on any computer without any prior installation process.
Besides the usual characteristics of the Knoppix distribution, this version is
especially made for people who need:
- To find themselves in a familar GNU/Linux Knoppix environment and process their
personal data on any available computer.
All they need is to carry with them their Knoppix CD-Rom and a removable
storage unit for their personal files (that can be as small as an "USB
FlashDrive" for example).
- To work in a secure environment: The GNU/Linux Knoppix operating system residing
entirely on a CD, it cannot be tampered with, nor receive any trojan horses,
viruses or software keyboard sniffers. Furthermore, GNU/Linux operating systems
are natively immune to "Windows viruses" that infect a very high number of
computers running the Windows operating system.
(Please note that this of course cannot protect you from possible hardware
keyloggers, recording devices that could be physically installed on your
computer's motherboard, inside its box or keyboard, or remote monitoring of
your computer activity thru its radio-frequency emissions, such as "Tempest"
attacks)
- This Knoppix version allows storing the users's personal files (home
directory) on a removable storage unit, such as an "USB FlashDrive" or an
IOMEGA ZIP disk. All the data stored on this device can be encrypted using
the AES algorithm and protected by a "secret phrase" without which all the
contents of the storage device will be inaccessible.
- If the computer on which this Knoppix version is used has a "GNU/Linux Swap"
partition on its hard drive (disk space used for extending the computer's
virtual memory), then Knoppix will use it. However, all the data that will
be written on the computer's hard disk will be automatically encrypted using
the AES algorithm and a randomly generated session key, so this data will be
definitely unusable once the Knoppix session is finished.
No data will ever be written "in clear" in the swap partition by this
version of Knoppix.
- If the computer on which this Knoppix version is used doesn't have enough
RAM memory, but has enough free space on a DOS/Windows FAT/FAT32 (not NTFS)
partition, then Knoppix will be able to create a Knoppix swap file on this
existing disk partition. This swap file will be automatically encrypted using
the AES algorithm and a randomly generated session key, so this data will be
definitely unusable once the Knoppix session is finished.
No data will ever be written "in clear" in the swap file by this
version of Knoppix.
The swap file itself will be kept from one session to another, so it can be
automatically reused next time (with a new random session key) without the
need for recreating it each time.
- This Knoppix version includes the GnuPG 1.2.1 file and mail encryption
tool (OpenPGP standard) and the KGPG key management utility.
- This Knoppix version includes the Postfix mail server software (SMTP MTA),
able to automatically encrypt, using TLS, the e-mail you send, provided
your recipient's e-mail server is also able to use this protocol.
This mail server software enables you to send your e-mail without using
your Internet Access Provider's SMTP servers.
_______________________________________________________________________________
Main particularities of Knoppix-MiB 3.2 Privacy Edition:
--------------------------------------------------------
Besides the main new features brought by "standard" Knoppix 3.2 among which:
- KDE 3.1.1
- Ximian Evolution 1.2
- Script for automatic Flashplayer download and installation
Knoppix-Mib "Privacy Edition" adds the following particularities:
- Automatic support of encrypted swap partitions (GNU/Linux), or encrypted swap-
files in DOS/Windows (FAT/FAT32) partitions.
- Security improvements (encryption)
- Bug fixes
- Automatic mount of persistent homedir at bootup, and automatic restoration
of optional custom system configuration, without needing to type specific
boot parameters.
- KGPG GnuPG keyring manager
- OpenOffice 1.0.2 in french and english, with french "Drayer" spell check
dictionaries.
- Mozilla 1.3 Chromium with Enigmail 0.74.0
- Postfix mail server (MTA) with TLS encryption, preconfigured with provided
generic certificates.
- Optional backup of custom system configuration in user's persistent home
directory.
- Some more french translations.
- French manpages
- GnuChess openings library.
- Support for Swiss-french keyboard using "knoppix lang=fr_CH" boot option
_______________________________________________________________________________
How to create a persistent home directory on a removable storage device:
------------------------------------------------------------------------
1) Insert your removable storage device, and the Knoppix CD-Rom, then boot
your computer from the Knoppix CD-Rom
2) Once the computer has booted, you will be presented with the KDE interface
and desktop. On the KDE Desktop, you will see several icons representing
the different (not in use) partitions of the computer's hard disk.
One of these icons will represent your removable storage device, if it has
been found at computer boot time.
- If you use a new, factory-formatted USB FlashDrive, it will most of the
times be represented as [sda1]
- If you use a new, factory-formatted ZIP disk, it will most of the times
be represented as [sda4]
- You may have to try several icons until you find the one that corresponds
to your actual removable device.
3) Check the device contents to make sure it's "the good one" by clicking on it.
- It will be automatically "mounted" (connected to Knoppix's filesystem)
read-only and a Konqueror (file manager / web browser) window will open.
From this, check that you are on the "good device", i.e., if you are using
a newly formatted USB FlashDrive or ZIP disk, it should look empty. If you
see a bunch of Windows O.S. files displayed, you're probably looking at the
computer hard disk, and not at your removable device.
4) Once you have identified your removable device, close the Konqueror window,
and "remount" it so it can be written to: Right-click on its icon on the KDE
desktop, then choose "Change read/write mode" and confirm that you would
like this partition to be writable.
5) Now you will be able to create the encrypted container-file that will host
your persistent home directory:
- From the KDE "K" menu, choose "KNOPPIX / Configure / Create persistent
home directory"
- You will be prompted for the "partition" on which to create it. Choose
the one that you have previously identified.
- You will then be prompted for the size to allocate to the home directory.
- Make sure to choose a size noticeably (about 10-15%) smaller than the
available space on the device, otherwise the container creation will
probably fail.
- You will then be prompted for a passphrase for encrypting your home
directory. If you choose to encrypt it, your passphrase must be at least
20 characters long. You are strongly advised to encrypt your home
directory.
BEWARE: If you forget your passphrase, the data contained on your home
directory will be IRREMEDIABLY LOST.
- The initialization of your container then begins. As the whole container
has to be filled first with random data, this can be a rather lengthy
operation. Don't panic ;-) Be patient.
- Then, you should be presented with a message stating that the operation
successfully completed.
6) Once the operation is complete, quit KDE (Menu "K", Quit Knoppix). Your
computer will stop.
Then, restart your computer with your removable device inserted. Your
persistent home directory should automatically be found.
=> If you have chosen to encrypt it with a pass phrase, the boot
process will stop, and you will be prompted for the necessary
pass phrase in order to access you encrypted, persistent home
directory.
=> Once booted, your persistent home directory will appear mounted under
/home/knoppix. You are by default logged as the "knoppix" user, so you
should store your personal files and settings in "/home/knoppix" which
will be the default location for storing your files.
_______________________________________________________________________________
How to use an encrypted GNU/Linux Swap partition:
---------------------------------------------
The good news is that there's nothing special to do. If your computer's hard
disk has a GNU/Linux Swap partition (type 82), it will be automatically used, and
encrypted, by Knoppix.
It will use a randomly generated session key, so nobody (not even you ;-)
knows it, and the contents of the swap will be irremediably lost once the
Knoppix session is finished.
CAUTION: At Knoppix shutdown time, the swap partition will be reformatted
into a "normal" (non-encrypted) swap partition. This is necessary
for your usual GNU/Linux to be able to reuse it, if it doesn't handle
encrypted swaps.
If you power your computer down brutally while Knoppix is running,
this won't be done, and your usual GNU/Linux will probably not be able
to use the swap partition.
In such a situation, all you need is either to manually run a
"mkswap" on the concerned partition, or easier, to start Knoppix
again, and terminate it properly.
_______________________________________________________________________________
How to use an encrypted swap file on a DOS/Windows FAT/FAT32 partition:
-----------------------------------------------------------------------
At Knoppix bootup, if it finds that your available memory is not-that-big,
and provided your computer has enough available space on a FAT/FAT32
partition, you will be proposed with the option of creating a Knoppix
encrypted swap file on this partition.
All you need to do is choose the amount of disk space that should be
allocated for it.
The rest is automatic. The swap file will be initialized (this can be a
lengthy process, because it has to be filled with random data, be patient ;-)
and then activated.
When Knoppix stops, the swap file is kept so it can be automatically reused
next time without needing to be recreated.
The swap file being encrypted with a random, single-use, session key, it
doesn't leave any data that could be exploited on the hard drive.
(If you want to delete it, you can do it from within Windows: You will find
the Knoppix encrypted swap file under C:\ or D:\ ... and it will be called
.knoppix.swp )
If you have "enough" memory, and Knoppix didn't propose to create such a file
at boot time, you still can choose to create one manually, to speed things up.
From the KDE "K" menu, choose "KNOPPIX / Configure / Swap file".
_______________________________________________________________________________
How to use (optionally) the local Postfix SMTP mail server
----------------------------------------------------------
If you wish to send your e-mail without transiting thru your Internet Access
Provider's SMTP server, you just need to specify "127.0.0.1" as the name of
the SMTP server (outgoing mail server) in the e-mail software that you
choose to use. Then, the local Postfix server will automatically handle your
outgoing e-mail.
Some notes however:
- The local Postfix SMTP server is able to automatically and transparently
encrypt your outgoing e-mail from server to server, but only if your
recipient's e-mail SMTP server handles this protocol as well. Otherwise,
your outgoing e-mail will be sent in the clear.
- If you use your local Postfix SMTP server, make sure that all of your
outgoing mail has actually been sent before disconnecting from Internet,
because it is asynchronously sent, and could possibly still be waiting
in spool queue, or in process of sending.
To check if your mail queue is empty, type in a root console the "mailq"
command.
- To force the immediate sending of all waiting messages, type in a root
console the "sendmail -q" command.
_______________________________________________________________________________
F.A.Q:
======
A) QUESTIONS ABOUT THE ISO IMAGE AND CD-ROM
-------------------------------------------
1) Q: How can I check that the ISO image that I have downloaded from a FTP
server is complete, correct, and has not been tampered with ?
A: Each FTP server that carries an ISO image of Knoppix-MiB must also carry
in the same directory a GnuPG signature of this image, and a clear-signed
MD5 checksum. Example:
knoppix-3.2-MiB-11b.iso (CD-Rom ISO image)
knoppix-3.2-MiB-11b.iso.sig (ISO image GnuPG detached signature)
knoppix-3.2-MiB-11b.iso.md5.asc (ISO image MD5 checksum, clearsigned)
Each FTP server must also carry my GnuPG public key mib.pub.key.asc, which
ID and fingerprint are the following:
pub 1024D/DDE8AC6E 2002-08-22 Michel Bouissou
Empreinte de la clé = 5DC5 B10F 8863 302F 0504 5A77 2CC8 8D51 DDE8 AC6E
For checking the ISO's GnuPG signature, you need to have GnuPG (or PGP)
installed on your system. This FAQ's goal is not to explain the use of
GnuPG or PGP, please check the corresponding documentation.
As a summary:
- Copy the ISO image, its detached signature and my public key into the
same directory on your hard disk;
- Import my public key with the following command:
gpg --import mib.pub.key.asc
- Then check the ISO's signature with the following command:
gpg knoppix-3.2-MiB-11b.iso.sig
- GnuPG must then state that the signature of the ISO image with my key
is valid, which proves that the ISO image is complete and conform to
the original.
If you don't have GnuPG nor PGP, you still can check that the ISO image's
MD5 checksum is conform with the provided knoppix-3.2-MiB-11b.iso.md5.asc
file, which will show that the ISO image has been correctly and completely
downloaded, but won't protect you against someone having purposedly
tampered with both the ISO image and the MD5 checksum file.
For checking the ISO's MD5 checksum:
- In GNU/Linux, type the following command:
md5sum knoppix-3.2-MiB-11b.iso
...then check the obtained result against the corresponding line that
you will find in the file knoppix-3.2-MiB-11b.iso.md5.asc.
If they match, then the MD5 checksum of your ISO image is conform.
- In Windows, you can find a program that will allow you to calculate
the ISO image's checksum at the following address:
http://www.toast442.org/md5gui.shtml
2) Q: How can I check that the CD I have burned from the ISO image is correct
and readable ?
A: After having checked (see question above) that your ISO image itself is
valid, you can boot your Knoppix CD using the option:
knoppix testcd
(which can be combined with other options). As soon as the GNU/Linux kernel
is loaded, the system will check the complete CD, and will issue an error
message if something is wrong.
3) Q: How can I burn a CD-Rom from an ISO image ?
A: - In GNU/Linux, the simplest way is to burn it using "cdrecord" command-line
utility, by typing the following command:
cdrecord dev=0,6,0 knoppix-3.2-MiB-11b.iso
(replace dev=0,6,0 with the address of your CD burner on the SCSI chain.
If you don't know it, use "cdrecord -scanbus" to find it. You can also
specify the burning speed adding the "speed=8" option (for example) in
the cdrecord command line, before the name of the ISO image to burn.
You can also use one of the numerous graphical front-ends available,
such as K3B or xcdroast etc.
- In Windows, use your usual burning software. Please check its documen-
tation to find out how to create a CD-Rom from a ISO image.
4) Q: My computer is unable to boot from a CD-Rom. Can I create a boot diskette
and use it with Knoppix ?
A: Yes, easily. First insert an empty, formatted floppy disk in your drive,
cd into the "KNOPPIX" CD-Rom directory, and:
- In GNU/Linux, type the following command:
dd if=boot.img of=/dev/fd0
- In Windows, open a DOS Window, cd into the KNOPPIX directory of the
CD-Rom, for example using the commands:
d:
cd \KNOPPIX
then create your boot floppy using the command:
mkfloppy.bat
B) DISPLAY OR GRAPHICS PROBLEMS
-------------------------------
1) Q: At bootup, my computer displays "Loading vmlinuz....." and "Loading
miniroot.gz....." then my monitor goes off...?
A1: Your system probably doesn't support the VESA FrameBuffer 1024x768
mode that Knoppix selects at bootup. Try booting specifying one of the
following options:
knoppix vga=788 (To select 800x600 FrameBuffer mode)
or
knoppix vga=normal (To initally start in 80x25 text mode)
A2: Your problem may not be a display problem, but a more general boot
problem. Refer to corresponding FAQ section.
2) Q: The "X" graphic environment doesn't start properly on my system. My
monitor goes off, or displays weird stripes...
A1: If your monitor is not quite recent, it may be unable to report its
supported frequencies to Knoppix, and may not support the default
frequencies that Knoppix will select in such a case. If you know your
monitor's characteristics (see its manual), you can specify the maximum
horizontal frequency it can handle at boot time, using the boot option
"knoppix maxhsync=65" for example.
If you don't know your monitor's max frequency, you can try the
"knoppix oldscreen" boot option, that is equivalent to "knoppix maxhsync=54"
A2: Your hardware may not support the screen resolution or vertical refresh
rate that Knoppix tries to use. You can try to specify a mode which you
think your system will support, using boot options like:
knoppix xscreen=800x600 (selects a 800x600 X display)
or
knoppix xvrefresh=60 (selects a 60 Hz vertical refresh rate)
You can combine such options, for exmaple:
knoppix xscreen=800x600 xvrefresh=60
or even:
knoppix xscreen=800x600 xvrefresh=60 maxhsync=54 vga=normal
A3: The X driver may not work with your graphics board. You can try to use
The generic "FrameBuffer" X driver, that simultaneously specifies the
desired resolution, by booting with one of the options:
fb1024x768
or
fb800x600
NOTE: If you use one of these options, do not type "knoppix fb1024x768",
but "fb1024x768" alone. You MUST NOT combine this option with other
display or graphics options, especially the "vga=" option. For example,
do not try to boot with "fb1024x768 vga=normal".
On the other hand, you can combine FrameBuffer options with other options
that don't concern display, for example you can perfectly use something
like "fb1024x768 home=/dev/sda1". In such combinations, the "fb....."
option must always come first.
3) Q: The graphical environment doesn't start on my system. I get messages such
as:
retrying with Server XFree86(vesa)
retrying with Server XFree86(fbdev)
Error : no suitable X-Server found for your card.
A: On some machines, or with some graphics boards, Knoppix cannot determine
which graphics X server to use with your hardware. It is then necessary
to specify it manually as a boot option, using "xmodule=".
For example, some NVidia boards are not correctly detected. To use them,
you must specify at the boot prompt:
knoppix xmodule=nv
4) Q: I have found the correct options for booting Knoppix with my graphics
card and monitor. Is it possible to memorize them, so I don't need to
type them at each boot?
A: Yes, if you have a persistent home directory. In this case, after having
booted with your persistent home directory and the correct options, you
juste need to "save configuration", specifying that you want to save your
graphics (XF86Config) configuration. Simply use the "K / KNOPPIX /
Configure / Save configuration" menu option.
C) ADMINISTRATOR "ROOT" PASSWORD
--------------------------------
1) Q: For some features, the system asks me for the administrator "root"
password, and I don't know it...?
A: The "root" administrator doesn't have any default password. You must set
a root password yourself before using such features:
- Shit to root text console using the key combination:
[Ctrl]-[Alt]-[F1]
- Press [Enter] to get a prompt, then type the following:
passwd [Enter]
- Enter a password of your choice (twice)
- Go back to the graphic environment by using the key combination:
[Alt]-[F5]
- Now you can use the root password that you have just defined.
- If you save your configuration using the "K / KNOPPIX / Configure /
Save configuration..." menu option, then this password can be saved
and restored at next boot.
D) USE OF A PERSISTENT PERSONAL "HOME" DIRECTORY
-------------------------------------------------
1) Q: For creating a persistent home directory, what's the difference between
choosing a "complete partition" or an "image file" ?
A: - If you use an image file, it will be called .knoppix.img and added into
the existing filesystem in your partition (on your USB FlashDisk for
example). Pre-existing files on this partition will not be affected,
only the .knoppix.img file that will hold you personal directory will
be added. If you don't use all the available space, you still can store
other files (that won't be encrypted) on this partition, besides your
persistent home directory container.
- If you use an image-file, it will be auto-detected at boot time without
the need for specifying any special boot option, for your persistent
homedir to be recognized and mounted.
- If you use an entire partition, this partition will be entirely
reformatted, and all data it may contain will be lost. You persistent
home directory will use the entire partition; you won't be able to
store anything else on it.
- If you use an entire partition, it will NOT be auto-detected at boot
time, and you will need to specify a boot opion such as
"knoppix home=/dev/sda1" (for example) in order to mount and use your
persistent home directory.
- PLAUSIBLE DENIABILITY ISSUE: Using an entire partition is better for
"plausible deniability", as it cannot be auto-detected, but furthermore
the partition appears as unformatted, not containing any file or
filesystem. The partition just appears being full of meaningless
random data. Thus one can deny that this partition contains anything,
and state it is not formatted at all.
- On the contrary, the use of an "image file" is more visible: The file
and its size are clearly visible, even though the file seems to be
full of meaningless random data, without the use of the secret phrase
that only allows to decrypt and mount it. But anyway one cannot deny
that this files does exist, and its name "knoppix.img" tends to show
that this is an encrypted personal directory.
2) Q: When I save my Knoppix configuration, is the resulting archive encrypted
or password-protected ?
A: - If you choose to put the archive into an encrypted home directory, it
will be encrypted along with it.
- If you choose to put the archive elsewhere, it will not be encrypted,
nor password-protected.
3) Q: Is there a way to mount and use my encrypted personal directory with
any other operating system than Knoppix-MiB ?
A: Yes. Your homedir is encrypted using loop-aes, which is standard on
several GNU/Linux distributions (such as Mandrake).
To mount your encrypted homedir on such a distribution, first create
a directory for using as a mountpoint (i.e. /home/me/knophome), and
mount your removable media (as /mnt/flashdisk for example). Then type
the following command in a root console:
mount -t ext3 -o loop,encryption=AES256 /mnt/flashdisk/.knoppix.img /home/me/knophome
(to umount, just type: umount /home/me/knophome )
If your distribution uses cryptoapi rather than loop-aes, you still
can mount your encrypted homedir using:
losetup -e aes -k 256 -p sha512 /dev/loop1 /mnt/flashdisk/.knoppix.img
mount -t ext3 /dev/loop1 /home/me/knophome
(to umount, use:
umount /home/me/knophome
losetup -d /dev/loop1
)
Latest version of cryptoapi uses the following syntax:
losetup -e aes -k 256 -H sha512 /dev/loop1 /mnt/flashdisk/.knoppix.img
mount -t ext3 /dev/loop1 /home/me/knophome
and you can mount the encrypted device in a single step using:
mount -t ext3 -o loop,encryption=aes,keybits=256,phash=sha512 /mnt/flashdisk/.knoppix.img /home/me/knophome
4) Q: I have forgotten the secret phrase that protects access to my encrypted
home directory. How can I access my data ?
A: You cannot. If you have lost your secret phrase, the contents of your
encrypted home directory are irremediably lost, and there is no way to
access them. Otherwise, the encryption that locks your personal directory
would be useless.
5) Q: How can I change the secret phrase that protects my encrypted home
directory ?
A: you cannot. But you can create a new encrypted home directory with a new
secret phrase, and copy the contents of the old one into the new one, as
explained in the following topic.
6) Q: My encrypted home directory is full. Can I enlarge it ?
A: No, you cannot enlarge it. But you can create a new one, larger, and copy
the contents of the old one into the new one, following the instructions
below:
We will start assuming you have a /dev/hda1 Windows FAT or FAT32 formatted
hard disk partition, and your persistent home directory resides on a
.knoppix.img container, hosted on an USB FlashDisk seen as /dev/sda1,
which is the most general case. If your personal case differ, you will
have to adapt the instructions slightly.
1) Boot WITHOUT MOUNTING your persistent homedir, but with the USB
flashdisk inserted, using the option:
knoppix home=none
2) Set a "root" password, as explained in the corresponding section of
this FAQ
3) Open a "root terminal", i.e. in KDE.
4) Mount the hard disk partition read-write:
mount -t vfat /dev/hda1 /mnt/hda1
5) Mount the USB FlashDisk partition read-write:
mount -t vfat /dev/sda1 /mnt/sda1
6) Copy your home directory encrypted container-file onto the hard disk,
calling it "knoppix-oldhome":
cp /mnt/sda1/.knoppix.img /mnt/hda1/knoppix-oldhome
7) Delete this file from the FlashDisk, to get free space:
rm /mnt/sda1/.knoppix.img
8) Create a new container-file onto the FlashDisk, with the desired size
(i.e. 40 MB):
dd if=/dev/urandom of=/mnt/sda1/.knoppix.img bs=1M count=40
then:
chown knoppix: /mnt/sda1/.knoppix.img
then:
sync
9) Mount this new container onto an encrypted loop-device. You will have
to type your secret phrase. Be VERY CAREFUL because you will type it
only once, without any echo of what you type, and without any check:
losetup -e AES256 /dev/loop5 /mnt/sda1/.knoppix.img
10) Create an ext3 filesystem on the encrypted loop-device:
mke2fs -m 0 -j -L HOME /dev/loop5
then:
sync
then check with:
e2fsck -fv /dev/loop5
then:
sync
11) Deactivate the loop-device:
losetup -d /dev/loop5
12) Create mountpoints that will be used for copying the contents of the
old home directory into the new one:
mkdir -p /ramdisk/old/home
mkdir -p /ramdisk/new/home
13) Mount the old container, then the new one:
mount -t ext3 -o ro,loop,encryption=AES256 /mnt/hda1/knoppix-oldhome /ramdisk/old/home
mount -t ext3 -o loop,encryption=AES256 /mnt/sda1/.knoppix.img /ramdisk/new/home
14) Copy the complete contents of the old home into the new one:
cp -a /ramdisk/old/home /ramdisk/new/
then:
sync
sync
15) Dismount both containers:
umount /ramdisk/old/home
umount /ramdisk/new/home
The transfer if finished, you can reboot and check that your new 40 MB
homedir mounts allright and holds your files.
Once this is checked, you can delete the old container knoppix-oldhome
from the hda1 partition of your hard disk.
"Simple delete" should be enough, the container being encrypted anyway,
but if you prefer to wipe it completely, you can do something like:
mount -t vfat /dev/hda1 /mnt/hda1
losetup /mnt/hda1/knoppix-oldhome /dev/loop5
dd if=/dev/urandom of=/dev/loop5
(this will end with a "no space left on device" message)
then:
sync
losetup -d /dev/loop5
rm /mnt/hda1/knoppix-oldhome
umount /mnt/hda1
E) USE OF THE COMPUTER'S HARD DISK
----------------------------------
1) Q: If I try the Knoppix-MiB operating system on my computer, will this affect
its hard disk, or my usual operating system's behaviour ?
A: No. Unless you purposedly specify it, and in some specific cases (see below
topics), Knoppix-MiB won't write anything onto your computer's hard disk,
and won't make any change on it. As soon as you remove the Knoppix-MiB CD-
Rom and reboot, you'll find your computer in the exact same state as it
was before.
2) Q: In which case will Knoppix-MiB write anything on my hard disk without
asking me first ?
A: Only if your hard disk already contains a "GNU/Linux swap" (type 82) parti-
tion. In this case, Knoppix-MiB will automatically use this swap space
for enlarging the virtual memory it can use. This partition will then
be automatically encrypted by Knoppix-MiB during its run, and its original
contents will be overwritten, which is of absolutely no consequences,
a swap partition which only purpose is to serve for temporary memory swap.
3) Q: Is there any situation where Knoppix-MiB could damage by itself data or
filesystems that are on my computer's hard drive ?
A: In a SINGLE case: If your hard drive is extremely BADLY configured, and
it holds a partition which type is "82: GNU/Linux swap", but this partition
actually contains another kind of filesystem, AND Knoppix-MiB is unable to
recognize this filesystems. In this case, Knoppix-MiB will think that this
partition is a GNU/Linux Swap (as indicated by its type), and will use this
partition encrypting it, which will irremediably destroy its contents.
However, such an accident will not happen on any normally configured
system, except for this very particular case.
(I specifically refuse any liability for damages and data losses that
would heppen in such a case, caused by a very important mistake in the
pre-existing computer hard disk configuration. You've been warned ;-).
4) Q: Is it possible, using Knoppix-MiB, to access the data present on the
computer's hard disk ?
A: Yes, but only if you purposedly specify it, by "mounting" the computer's
hard drive partitions. To avoid mistakes that could affect the computer's
hard disk, its partitions are normally not "mounted" by Knoppix-MiB at
boot, and thus are not accessible.
An hard disk partition will be automatically mounted read-write by
Knoppix-MiB only if necessary for one of the following reasons:
- The partition holds the container image-file for a persistent home
directory, because you purposedly created it there, and it must be
accessible.
- It's a DOS/Windows FAT/FAT32 partition, and you have purposedly created
a "swap file" on it. In this case, as in the previous one, this file
must be accessed read-write, thus the corresponding partition is auto-
matically "mounted" by Knoppix-MiB.
In all other cases, the hard disk partitions are not mounted by default,
unless you do it manually.
If you use the KDE default desktop environment, clicking on one of the
hard disk partitions icon on the desktop, will cause it to be mounted
READ-ONLY, so you can access the files it holds, but cannot accidentally
modify or overwrite them.
If you wish to access the hard disk partition in READ-WRITE mode, you
then need to right-click on the partition's icon, and select "Change
read/write mode". Then you will be able to access read-write the files
that this partition holds.
5) Q: Is it possible to definitely install Knoppix-MiB on my computer's hard
disk, so I don't need the CD-Rom anymore, its execution is faster and
I can customize it (install new programs etc.) ?
A: Knoppix-MiB is based upon original Knoppix, and as original Knoppix, can
be installed on your computer's hard disk.
However, the Knoppix-MiB project is specifically oriented to nomad use
with the CD-Rom and without hard disk installation. I have personnally
NOT TESTED Knoppix-MiB hard disk installation (and would be very interes-
ted in receiving your feedback if you have done it, to complete this
documentation).
As a summary, to install Knoppix-MiB on your hard disk, you must use a
script that will guide you during the different installation steps, will
help you creating the necessary hard disk partitions, and will execute
the installation.
To do this:
- Shift to "root" text console with the key combination:
[Ctrl]-[Alt]-[F1]
- Press [Enter] to get a commmand prompt
- Then start the script:
knx-hdinstall
- And follow provided instructions.
Check original Knoppix documentation for more information regarding
hard disk installation.
F) BOOT PROBLEMS
----------------
1) Q: At bootup, my computer displays "Loading vmlinuz....." and "Loading
miniroot.gz....." then my monitor goes off or my system hangs...?
A1: First check this isn't a simple display problem, check corresponding
FAQ section.
A2: One of your peripherals, or motherboard components, may be incompatable
with the drivers that Knoppix auto-loads at bootup, or with Knoppix's
autodetection and autoconfiguration system.
Try booting, typing at the boot prompt:
failsafe
If the system starts, there was such a problem.
To isolate the problem more precisely, note that booting with:
failsafe
is equivalent to booting with the following combination of options:
knoppix vga=normal noapic noscsi nodma noapm nousb nopcmcia nofirewire
noagp nodhcp xmodule=vesa
It is quite probable that only one of these options is necessary to
allow your particular system to boot, so you should try to determine
which one, by trying all of them successively, for example:
knoppix noapic
then
knoppix noscsi
then
knoppix noagp
...and so on, until your system boots properly, once you have found the
"good" option.
One option may not be enough, and you may need to combine 2 or 3 of them
depending upon your particular system.
In such a case, you can proceed in the reverse order, starting booting
with the complete series of options, then removing them one by one until
your system won't boot properly: Then you know you have just removed a
necessary option.
2) Q: At bootup, I get an error message "ERROR: Only one processor found" ...?
A: This message doesn't matter. Just ignore it.
The Knoppix kernel can handle multi-processor systems, and can in some
situations think that your system may be multi-processor when it is not
(especially on AMD processor systems). Then, as it founds a single
processor, it issues this message, but this is not a problem.
G) NETWORKING
-------------
1) Q: Can I see and access, using Knoppix-MiB, files that are hosted on Windows
machines in my LAN, in their "shared folders" ?
A: Yes. The simplest tool for this purpose is "LinNeighborhood", that you
will find in the "K / Internet" menu.
With this tool, you can see and mount the "folders" that are "shared" by
Windows machines, and, after having mounted them, you can open a file
manager (such as Konqueror) and work directly on these files.
H) TRANSLATIONS INTO FRENCH
---------------------------
This topic is discussed only in the french section.
You can find the latest version of the present document at the following
address:
http://www.bouissou.net/knoppix-mib/README-MiB
I hope you will enjoy this Knoppix-MiB "Privacy Edition" !
Michel Bouissou
===============================================================================
===============================================================================
===============================================================================
VERSION FRANCAISE - FRENCH VERSION:
===================================
Licence: Les modifications et améliorations que j'ai effectuées sur la
distribution Knoppix sont fournies sous licence GPL (General Public
License). Voir http://www.gnu.org/licenses/gpl.html ou le fichier
gpl.txt qui figure dans le répertoire /KNOPPIX de ce CD-Rom.
L'utilisation, la copie, la redistribution et la modification de
ce CD-Rom et des logiciels qu'il contient sont autorisées sous
réserve du respect des termes de la licence GPL.
Configuration requise:
- PC-Compatible, processeur AMD ou Intel, famille x86
- 128 MB de mémoire RAM nécessaire pour utiliser l'environnement graphique KDE
proposé par défaut.
- Plus il y a de RAM, mieux c'est ;-)
- Lecteur CD-Rom 24X ou plus rapide
*** NOTE IMPORTANTE ***
Si vous avez créé un répertoire personnel persistant en utilisant la Knoppix
Privacy Edition version 3.1, et que vous désirez utiliser ce répertoire avec
la version 3.2, vous DEVEZ renommer son container chiffré .knoppix, qui réside
sur votre unité amovible, en .knoppix.img
Par défaut, la Knoppix-MiB boote en français avec un clavier français. D'autres
langages ou dispositions de claviers sont disponibles. J'ai en particulier
ajouté le support du clavier suisse romand, et celui du clavier canadien
français.
Pour obtenir le clavier suisse romand, taper:
knoppix lang=fr_CH au prompt de boot
Pour le canadien français, taper:
knoppix lang=cf
Pour la belgique, taper:
knoppix lang=be
Pour l'anglais, taper:
knoppix lang=en
_______________________________________________________________________________
Cette version de la Knoppix a été produite pour offrir à chacun un système
d'exploitation GNU/Linux contenu sur un CD-ROM immédiatement bootable sans aucune
installation particulière, sur n'importe quel ordinateur.
Outre les caractéristiques habituelles de la Knoppix, cette version est
particulièrement destinée aux personnes ayant besoin de:
- Retrouver un environnement familier (système d'exploitation GNU/Linux Knoppix)
sur tout ordinateur disponible, pour pouvoir y travailler avec leurs données
personnelles sans aucune installation sur le disque dur.
Il suffit pour cela de transporter avec soi le CD-Rom Knoppix et l'unité de
stockage de données personnelles (qui peut être de très faible encombrement,
comme un "FlashDrive USB" par exemple).
- Travailler dans un environnement sécurisé: Le système d'exploitation GNU/Linux
Knoppix résidant entièrement sur CD-Rom, il ne peut pas être falsifié, ni
contenir de chevaux de Troie, virus, espions de clavier, etc. D'autre part,
les systèmes d'exploitation GNU/Linux sont par nature insensibles aux "virus
Windows" qui infestent un grand nombre de machines utilisant ce système
d'exploitation.
(Notez cependant que ceci ne peut pas vous protéger contre des systèmes
d'espionnage matériels, comme des dispositifs d'enregistrement installés
directement sur la carte mère, dans le boîtier, ou dans le clavier
de l'ordinateur, ni contre l'espionnage des fuites radio-fréquences qui
émanent de votre ordinateur -- attaques dites "Tempest")
- Cette version de Knoppix permet à l'utilisateur de stocker l'ensemble de ses
fichiers de données personnels (home directory) sur une unité amovible de
faible encombrement, comme par exemple un "FlashDisk USB" ou un disque ZIP.
Les données qui y sont stockées peuvent être chiffrées à l'aide de
l'algorithme AES et protégées par une "phrase secrète" sans laquelle le
contenu de cette unité sera inaccessible.
- Si la machine sur laquelle est utilisée cette version de Knoppix comporte
une partition de disque dur de type "Swap GNU/Linux" (espace d'échange, mémoire
virtuelle), alors Knoppix utilisera cette partition du disque dur pour
augmenter la mémoire disponible. Toutefois, toutes les données écrites sur
cette partition du disque dur seront chiffrées en utilisant l'algorithme
AES, à l'aide d'une clé de session aléatoire unique, aussi ces données
seront définitivement inexploitables aussitôt Knoppix arrêté.
Aucune donnée ne sera jamais écrite "en clair" dans la partition de swap
par cette version de Knoppix.
- Si la machine sur laquelle est utilisée cette version de Knoppix comporte
une mémoire insuffisante, mais possède de l'espace disque disponible sur
une partition DOS/Windows de type FAT ou FAT32 (non NTFS), alors Knoppix
pourra créer un fichier d'échange (mémoire virtuelle) dans cette partition
existante. Ce fichier sera automatiquement chiffré en utilisant l'algorithme
AES, à l'aide d'une clé de session aléatoire unique, aussi ces données
seront définitivement inexploitables aussitôt Knoppix arrêté.
Aucune donnée ne sera jamais écrite "en clair" dans la partition de swap
par cette version de Knoppix.
Le fichier d'échange sera par contre conservé d'une session sur l'autre, et,
s'il est trouvé au démarrage, sera automatiquement utilisé par Knoppix (avec
une nouvelle clé, différente) sans qu'il soit nécessaire de le recréer.
- Cette version de Knoppix comporte l'outil de chiffrement GnuPG 1.2.1
(Standard OpenPGP), ainsi que l'utilitaire de gestion de clés KGPG.
- Cette version de Knoppix comporte un logiciel serveur de courrier SMTP
(Postfix) capable de chiffrer automatiquement par TLS le courrier qu'il
envoie, à condition toutefois que le serveur destinataire soit également
capable de gérer ce protocole.
Ce logiciel serveur peut vous permettre d'envoyer votre courrier sans passer
par le serveur SMTP de votre fournisseur d'accès Internet.
_______________________________________________________________________________
Principales particularités logicielles de la Knoppix-MiB 3.2 Privacy Edition:
-----------------------------------------------------------------------------
En plus des nouveautés principales apportées par la Knoppix 3.2 "standard",
comme par exemple:
- KDE 3.1.1
- Ximian Evolution 1.2
- Script de téléchargement et installation automatiques de FlashPlayer
La version Knoppix MiB "Privacy Edition" ajoute les particularités suivantes:
- Support automatique des swaps chiffrés sur partition de Swap GNU/Linux, ou sur
fichier dans une partition DOS/Windows FAT/FAT32
- Améliorations de sécurité (chiffrement)
- Correction de bugs
- Montage automatique du répertoire personnel au démarrage, et restauration
automatique d'une configuration personnelle éventuellement enregistrée, sans
devoir utiliser de paramètre de boot.
- Gestionnaire de porte-clés KGPG
- OpenOffice 1.0.2 avec langues française et anglaise, et dictionnaires de
contrôle orthographique "Drayer" français. (Voir Outils / Options pour les
sélectionner).
- Mozilla 1.3 Chromium avec Enigmail 0.74.0
- Serveur de mail (MTA) Postfix avec chiffrement TLS (préconfiguré avec
certificats génériques fournis)
- Sauvegarde optionnelle de la configuration système dans le répertoire
personnel permanent de l'utilisateur.
- Divers scripts et icônes traduits en français
- Pages de manuel (manpages) en français
- Bibliothèque d'ouvertures pour GnuChess.
- Support du clavier Suisse Romand par option "knoppix lang=fr_CH" au boot
_______________________________________________________________________________
Création d'un répertoire personnel persistant sur une unité amovible:
---------------------------------------------------------------------
1) Insérez votre unité amovible et le CD-Rom Knoppix, puis bootez votre
ordinateur depuis le CD-Rom Knoppix.
2) Une fois l'ordinateur démarré, vous arriverez sur le bureau de l'interface
KDE. Sur ce bureau, vous verrez plusieurs icônes représentant les diffé-
rentes "partitions" de disque dur et unité de stockage détectées par le
système.
Une de ces icônes représentera votre unité de stockage amovible, si elle
a été correctement détectée par Knoppix.
- Si vous utisez un "FlashDisk USB" neuf et formaté d'usine, il sera le
plus souvent visible comme "sda1".
- Si vous utilisez une disquette IOMEGA ZIP neuve, formatée d'usine, elle
sera le plus souvent visible comme "sda4".
- Vous devrez peut-être essayer plusieurs icônes avant de trouver celle qui
correspond effectivement à votre unité de stockage amovible.
3) Vérifiez le contenu de cette unité pour vous assurer que c'est bien "la
bonne": Cliquez sur l'icône.
- L'unité sera alors automatiquement "montée" (connectée au système de
fichiers de Knoppix) en lecture-seule, et Konqueror (le gestionnaire de
fichiers et navigateur Web) ouvrira une fenêtre affichant son contenu.
Vérifiez alors que c'est bien la bonne unité. Par exemple, une unité
FlashDisk ou ZIP neuve ne devrait contenir aucun fichier. Si par contre
vous voyez tout un paquet de fichiers Windows, vous êtes probablement en
train de regarder le contenu du disque dur de l'ordinateur, et non pas
votre unité amovible.
4) Une fois que vous avez identifié avec certitude votre unité amovible,
fermez la fenêtre de Konqueror, et "remontez-la" en lecture-écriture:
faites un clic-droit sur son icône sur le bureau KDE, choisissez
"Change read/write mode", et confirmez que vous voulez activer l'écriture
sur cette partition.
5) Vous allez maintenant pouvoir créer le container chiffré sur lequel
résidera votre répertoire personnel persistant:
- Depuis le menu "K" de KDE, choisissez "KNOPPIX / Configure / Créer un
répertoire personnel persistant"
- Le système vous demandera sur quelle partition vous désirez créer ce
répertoire. Choisissez la partition que vous avez précédemment
identifiée.
- Le système vous demandera la taille (en Mo) à allouer à votre répertoire
personnel.
- Choisissez une taille de 10 à 15% inférieure à l'espace disponible, sinon
la création de votre container échouera probablement.
- Le système vous demandera alors de taper une "phrase secrète" si vous
voulez chiffrer votre répertoire personnel. Votre phrase secrète devra
faire au moins 20 caractères. Le chiffrement de votre répertoire
personnel est fortement recommandé.
ATTENTION: Si vous oubliez votre phrase secrète, toutes les données
contenues dans votre répertoire personnel seront
irrémédiablement perdues.
- L'initialisation de votre container commencera alors. Comme le container
entier doit d'abord être rempli de nombres aléatoires, cette opération
peut durer assez longtemps. Pas de panique ;-) soyez patient...
- Ensuite, vous devriez obtenir un message indiquant que la création de
votre répertoire personnel a réussi.
6) Une fois l'opération terminée, quittez Knoppix (Menu "K", Quitter Knoppix).
Votre ordinateur s'arrêtera.
Ensuite, redémarrez votre ordinateur en gardant votre unité amovible
insérée. Votre répertoire personnel devrait être trouvé automatiquement.
=> Si vous avez choisi de le chiffrer avec une phrase secrète, le
processus de démarrage s'interrompra pour vous demander de la taper.
=> Une fois démarré, votre répertoire personnel persistant sera monté sous
/home/knoppix. Vous êtes par défaut loggué comme utilisateur "knoppix",
et vous devez donc stocker vos fichiers et réglages personnels dans
/home/knoppix, qui sera l'emplacement par défaut pour le stockage de
vos fichiers.
_______________________________________________________________________________
Comment utiliser une partition GNU/Linux Swap chiffrée:
---------------------------------------------------
La bonne nouvelle est qu'il n'y a rien de particulier à faire. Si le disque
dur de votre ordinateur contient une partition de type GNU/Linux Swap (82),
alors Knoppix l'utilisera et la chiffrera automatiquement.
Knoppix utilisera pour cela une clé de session à usage unique générée
aléatoirement, de manière à ce que personne (même pas vous ;-) ne connaisse
cette clé. Une fois la session Knoppix terminée, la clé sera perdue, et le
contenu de la partition de Swap définitivement inaccessible.
ATTENTION: Au moment de l'arrêt de Knoppix, la partition de swap sera
automatiquement reformatée comme partition de swap "normale" (non
chiffrée), ce qui est nécessaire pour qu'une version de GNU/Linux ne
gérant pas les swaps chiffrés puisse l'utiliser de nouveau.
Si vous arrêtez votre ordinateur brutalement alors qu'il tourne
sous Knoppix, ce reformatage ne sera pas effectué, et votre
partition de swap ne sera plus utilisable pour un GNU/Linux ne gérant
pas les swaps chiffrés.
Si ceci se produit, il vous suffit de refaire manuellement un
"mkswap" sur la partition concernée, ou, encore plus simple, de
relancer Knoppix, en veillant cette fois à l'arrêter convenablement.
_______________________________________________________________________________
Comment créer un fichier de swap chiffré sur une partition DOS/Windows:
-----------------------------------------------------------------------
Au démarrage de Knoppix, s'il trouve que la quantité de mémoire RAM disponible
sur votre ordinateur n'est pas-si-terrible ;-) et si votre disque dur contient
une partition DOS/Windows de type FAT ou FAT32 (pas NTFS), alors Knoppix vous
proposera de créer un fichier d'échange (swap) chiffré Knoppix sur cette
partition.
La seule chose que vous devrez faire est d'indiquer la taille du fichier
d'échange à créer.
Le reste est automatique. Le fichier d'échange sera initialisé (ce qui peut
être assez long, car il doit être entièrement rempli de nombres aléatoires),
puis activé.
A l'arrêt de Knoppix, le fichier d'échange est conservé pour pouvoir être
automatiquement réutilisé à la session suivante sans qu'il soit nécessaire
de le recréer.
Le fichier swap étant chiffré à l'aide d'une clé de session aléatoire à usage
unique, il ne stocke aucune donnée "en clair" qui pourrait être récupérée sur
votre disque dur.
(Si vous voulez le supprimer, vous pouvez le faire depuis Windows: Vous
trouverez le fichier d'échange Knoppix sous C:\ ou D:\ ... et il s'appellera
.knoppix.swp)
Si vous avez "assez de mémoire" et que Knoppix ne vous propose pas automati-
quement de créer un tel fichier, vous pouvez néanmoins en demander manuel-
lement la création, pour rendre l'exécution de Knoppix plus rapide et plus
efficace:
Depuis le menu "K" de KDE, choisissez "KNOPPIX / Configure / Configuration de
fichier SWAP sur une partition DOS".
_______________________________________________________________________________
Comment utiliser (optionnellement) le serveur de courrier Postfix local:
------------------------------------------------------------------------
Si vous souhaitez pouvoir envoyer votre courrier sans utiliser le serveur
SMTP de votre fournisseur d'accès, il vous suffit d'indiquer "127.0.0.1" comme
nom de serveur SMTP (courrier sortant) dans le logiciel d'e-mail que vous
choisirez d'utiliser. Le serveur Postfix local traitera alors automatiquement
votre courrier sortant.
Quelques notes toutefois:
- Le serveur Postfix local est capable ce chiffrer votre courrier sortant
automatiquement et de manière transparente, de serveur à serveur, mais
seulement à condition que les serveurs de vos destinataires en soient
également capables. A défaut, le mail sera expédié sans être chiffré.
- Si vous utilisez le serveur Postfix local, pensez à vous assurer que votre
courrier a bien été transmis AVANT de vous déconnecter d'Internet, car il
est transmis de manière asynchrone, et peut encore être en file d'attente.
Pour vous assurer que votre file de courrier a envoyer est vide, tapez
en console root la commande "mailq".
- Pour forcer l'envoi immédiat de tous les messages en file d'attente,
tapez en console root la commande "sendmail -q"
_______________________________________________________________________________
F.A.Q:
======
A) QUESTIONS CONCERNANT L'IMAGE ISO ET LE CD-ROM
------------------------------------------------
1) Q: Comment puis-je vérifier que l'image ISO que j'ai téléchargée depuis un
serveur FTP est complète, correcte, et qu'elle n'a pas été falsifiée ?
R: Chaque serveur FTP fournissant une image ISO de la Knoppix-MiB doit
également fournir dans le même répertoire une signature GnuPG de cette
image, et une somme MD5 signée en clair. Exemple:
knoppix-3.2-MiB-11b.iso (Image ISO du CD-Rom)
knoppix-3.2-MiB-11b.iso.sig (Signature GnuPG de l'image ISO)
knoppix-3.2-MiB-11b.iso.md5.asc (Somme MD5 de l'image ISO signée en
clair)
Chaque serveur FTP doit également fournir ma clé publique GnUPG:
mib.pub.key.asc dont l'ID et l'empreinte sont les suivants:
pub 1024D/DDE8AC6E 2002-08-22 Michel Bouissou
Empreinte de la clé = 5DC5 B10F 8863 302F 0504 5A77 2CC8 8D51 DDE8 AC6E
Pour vérifier la signature d'une ISO avec GnuPG, il faut que vous ayiez
GnuPG (ou PGP) installé sur votre système. Cette FAQ n'a pas la prétention
d'expliquer le fonctionnement de GnuPG ou PGP, veuillez vous référer aux
documentations appropriées. En bref cependant:
- Copiez l'image ISO, sa signature GnuPG et ma clé publique dans le même
répertoire de votre système;
- Importez ma clé publique avec la commande:
gpg --import mib.pub.key.asc
- Puis vérifiez la signature de l'ISO avec la commande:
gpg knoppix-3.2-MiB-11b.iso.sig
- GnuPG doit alors vous indiquer que la signature de l'ISO par ma clé est
valide, ce qui prouve que l'ISO est entière et conforme à l'original.
Si vous ne possédez pas GnuPG ni PGP, vous pouvez tout de même vérifier
facilement la conformité de la somme MD5 de l'ISO avec le fichier
knoppix-3.2-MiB-11b.iso.md5.asc fourni, ce qui vous garantira que l'ISO a
été correctement téléchargée, mais ne vous protégera pas contre une falsi-
fication volontaire portant à la fois sur l'image ISO et sa signature MD5.
Pour vérifier uniquement la somme MD5 de l'ISO:
- Sous GNU/Linux, tapez la commande:
md5sum knoppix-3.2-MiB-11b.iso
...puis comparez le résultat fourni avec la ligne correspondante que
vous trouverez dans le fichier knoppix-3.2-MiB-11b.iso.md5.asc.
Si les lignes sont identiques, la somme MD5 de votre image ISO est
conforme.
- Sous Windows, vous pouvez trouver un programme vous permettant de
calculer la somme MD5 de l'image ISO, à l'adresse suivante:
http://www.toast442.org/md5gui.shtml
2) Q: Comment puis-je vérifier que le CD que j'ai gravé moi-même est bien
lisible ?
R: Après avoir vérifié (voir question précédente) que votre image ISO elle-
même est valide, vous pouvez booter sur votre CD Knoppix en utilisant
l'option:
knoppix testcd
(qui peut être combinée avec d'autres options). Dès le chargement du
noyau GNU/Linux, le système vérifiera alors que la totalité de votre CD est
bien lisible, et affichera un message d'erreur si ce n'est pas le cas.
3) Q: Comment puis-je graver un CD à partir d'une image ISO ?
R: - Sous GNU/Linux, le plus simple est de la graver avec "cdrecord" en ligne de
commande, en tapant simplement la commande:
cdrecord dev=0,6,0 knoppix-3.2-MiB-11b.iso
(remplacez ici dev=0,6,0 par l'adresse de votre graveur sur la chaîne
SCSI. Si vous ne la connaissez pas, utilisez "cdrecord -scanbus" pour
l'afficher. Vous pouvez également préciser la vitesse de gravure à
employer en ajoutant l'option "speed=8" par exemple dans la ligne de
commande, avant le nom du fichier ISO à graver)
Vous pouvez également utiliser l'un des front-ends graphiques dispo-
nibles, comme K3B ou xcdroast, etc.
- Sous Windows, utilisez le logiciel de gravure en votre possession.
Veuillez vous réferer à sa documentation pour savoir comment graver
un CD-Rom à partir d'une image ISO.
Vous trouverez également plus d'informations concernant les principaux
logiciels de gravure sous Windows, sur la page suivante:
http://www.knoppixfr.org/index.php?page=affhowto&howto=gravknoppix
4) Q: Mon PC est incapable de booter sur un CD-Rom. Puis-je créer une disquette
de boot et utiliser la Knoppix ?
R: Oui, facilement. Commencez par insérer une disquette vierge formatée dans
votre lecteur, positionnez-vous dans le répertoire "KNOPPIX" du CD et:
- Sous GNU/Linux, tapez la commande:
dd if=boot.img of=/dev/fd0
- Sous Windows, ouvrez une fenêtre DOS, positionnez vous dans le réper-
toire KNOPPIX du CD-Rom, par exemple avec les commandes:
d:
cd \KNOPPIX
puis créez la disquette avec la commande:
mkfloppy.bat
B) PROBLÈMES D'AFFICHAGE
------------------------
1) Q: Au boot, je vois s'afficher "Loading vmlinuz....." et "Loading
miniroot.gz....." puis mon écran s'éteint...?
R1: Votre système ne supporte apparemment pas le mode VESA FrameBuffer
1024x768 que Knoppix sélectionne au boot. Essayez de booter en tapant
l'option:
knoppix vga=788 (pour sélectionner un FrameBuffer 800x600)
ou
knoppix vga=normal (pour démarrer initialement en mode texte 80x25)
R2: Votre problème n'est peut-être pas un problème d'affichage, mais un
problème de boot plus général. Voyez la section correspondante de cette
FAQ.
2) Q: L'environnement graphique X ne démarre pas correctement sur mon
ordinateur; l'écran s'éteint ou affiche des bandes bizarres...
R1: Si vous n'avez pas un moniteur très récent, il est peut-être incapable
d'indiquer à Knoppix les fréquences qu'il supporte, et ne supporte peut-
être pas la fréquence que Knoppix utilise par défaut dans ce cas. Si
vous connaissez les caractéristiques de votre moniteur (voir son manuel),
vous pouvez indiquer la fréquence horizontale maximale qu'il supporte en
utilisant l'option de boot "knoppix maxhsync=65" par exemple.
Si vous ne connaissez pas les caractéristiques de votre moniteur, vous
pouvez essayer de booter avec l'option "knoppix oldscreen", qui est
l'équivalent de "knoppix maxhsync=54".
R2: Votre matériel ne supporte peut-être pas la résolution d'écran ou la
fréquence de rafraîchissement vertical que Knoppix essaie d'utiliser.
Vous pouvez tenter de spécifier un mode dont vous pensez que votre
système le supportera mieux, avec des options comme:
knoppix xscreen=800x600 (sélectionne un affichage X en 800x600)
ou
knoppix xvrefresh=60 (sélectionne une freq. verticale de 60 Hz)
Vous pouvez combiner de telles options, par exemple:
knoppix xscreen=800x600 xvrefresh=60
ou même:
knoppix xscreen=800x600 xvrefresh=60 maxhsync=54 vga=normal
R3: Le pilote X ne fonctionne peut-être pas correctement avec votre carte
graphique. Vous pouvez essayez d'utiliser le pilote X générique appelé
"FrameBuffer", qui spécifie simultanément la résolution désirée, en
bootant avec l'une des options:
fb1024x768
ou
fb800x600
NOTE: Si vous utilisez une de ces options, ne tapez pas
"knoppix fb1024x768", mais uniquement "fb1024x768". Vous ne devez PAS
combiner cette option avec d'autres options de mode graphique, et en
particulier l'option "vga=". Ainsi, n'essayez pas de taper
"fb1024x768 vga=normal" par exemple.
Vous pouvez par contre combiner cette option avec d'autres options ne
concernant pas l'affichage; vous pouvez donc parfaitement utiliser
quelque chose comme "fb1024x768 home=/dev/sda1". Pour de telles
combinaisons, vous devez toujours mettre l'option "fb......" en
premier.
3) Q: L'environnement graphique ne démarre pas sur mon ordinateur. J'obtiens
des messages d'erreur comme:
retrying with Server XFree86(vesa)
retrying with Server XFree86(fbdev)
Error : no suitable X-Server found for your card.
R: Sur certaines machines, ou avec certaines cartes graphiques, Knoppix peut
être incapable de déterminer quel est le serveur graphique qui correspond
à votre matériel. Il peut alors être nécessaire de le spécificer comme
option de boot, en utilisant "xmodule=".
Par exemple, certaines cartes NVidia ne sont pas correctement détectées.
Pour les utiliser, vous devrez alors spécifier au boot l'option:
knoppix xmodule=nv
4) Q: J'ai trouvé les options correctes pour démarrer Knoppix avec ma carte
graphique et mon écran. Est-il possible de les mémoriser pour ne pas
avoir à les retaper à chaque démarrage ?
R: Oui, si vous utilisez un répertoire personnel persistant. Dans ce cas,
après avoir booté votre machine avec votre répertoire persistant et les
options graphiques adéquates, il vous suffit d'effectuer une "sauvegarde
de configuration", en spécifiant que vous souhaitez sauvegarder votre
configuration graphique (XF86Config). La sauvegarde s'effectue par le
menu: K / KNOPPIX / Configure / Sauvegarde de la configuration.
C) MOT DE PASSE DE L'ADMINISTRATEUR "ROOT"
------------------------------------------
1) Q: Pour certaines fonctions, le système me demande le mot de passe de l'ad-
ministrateur (root), et je ne le connais pas...?
R: L'administrateur "root" n'a pas de mot de passe par défaut. Vous devez
lui en attribuer un avant de pouvoir utiliser de telles commandes. Pour
ce faire:
- Basculez en console texte root avec la combinaison de touches
[Ctrl]-[Alt]-[F1]
- Tapez [Entrée] pour obtenir un prompt, puis tapez la commande:
passwd [Entrée]
- Entrez alors le mot de passe de votre choix (deux fois)
- Retournez dans l'environnement graphique avec la combinaison de touches
[Alt]-[F5]
- Vous pouvez maintenant utiliser le mot de passe "root" que vous avez
défini.
- Si vous sauvegardez votre configuration en utilisant l'option de menu
"K / KNOPPIX / Configure / Sauvegarde de la configuration", alors ce
mot de passe pourra être sauvegardé et réutilisé au prochain démarrage.
D) UTILISATION D'UN REPERTOIRE PERSONNEL PERSISTANT
---------------------------------------------------
1) Q: Pour créer un répertoire personnel persistant, quelle différence y a-t-il
entre utiliser "toute la partition" ou "un fichier image" ?
R: - Si vous utilisez un fichier image, il sera ajouté (sous le nom
.knoppix.img) dans le système de fichiers déjà existant dans votre
partition (sur votre FlashDisk USB par exemple). Les fichiers qui
peuvent déjà exister sur cette partition ne seront pas détruits ni
modifiés, seul le fichier .knoppix.img qui contiendra votre répertoire
personnel (éventuellement chiffré) sera ajouté. Si vous n'utilisez pas
toute la place disponible, vous pourrez stocker d'autres fichiers (non
chiffrés) dans cette partition, à côté du container de votre répertoire
personnel.
- Si vous utilisez un fichier image, il pourra être détecté automatique-
ment au boot, et vous n'aurez pas besoin de spécifier d'option pour que
votre répertoire personnel soit reconnu et utilisé.
- Si vous utilisez une partition entière, toute cette partition sera
reformatée, et les données qui y figurent seront effacées. Votre réper-
toire personnel utilisera toute la partition, vous ne pourrez rien
stocker d'autre sur cette partition.
- Si vous utilisez une partition entière, elle ne pourra pas être détec-
tée automatiquement au boot, et vous devrez spécifier l'option de boot
"home=/dev/sda1" (par exemple) pour qu'elle soit montée et utilisée.
- QUESTION DE LA DÉNIABILITÉ PLAUSIBLE: L'usage d'une partition entière
est meilleur du point de vue de la "déniabilité plausible", car non
seulement la présence d'un répertoire personnel ne peut pas y être
automatiquement détectée, mais de plus la partition apparaît comme
non formatée, vide de tout fichier ou système de fichiers. La parti-
tion apparaît simplement non formatée et remplie de nombres aléatoires
non significatifs. On peut donc nier qu'il y ait quoi que ce soit sur
cette unité de stockage, et affirmer qu'elle n'est pas formatée du tout.
- A contrario, l'usage d'un "fichier image" est plus visible: On le voit
clairement, ainsi que sa taille, sur la partition (dotée d'un système
de fichiers) où il est installé. Sans la phrase secrète, le contenu de
ce fichier est inexploitable, et il apparaît rempli de nombres aléa-
toires; toutefois, il est impossible de nier qu'il existe, et son nom
.knoppix.img tend à montrer qu'il s'agit bien d'un répertoire personnel
chiffré.
2) Q: Quand je sauvegarde ma configuration, l'archive résultante est-elle chif
-frée ou protégée par mot de passe ?
R: - Si vous choisissez de placer l'archive de configuration dans un réper-
toire personnel chiffré, alors elle sera chiffrée avec lui.
- Si vous choisissez de placer l'archive de configuration sur un autre
support ou partition (disquette par exemple), alors elle ne sera pas
chiffrée, ni protégée par mot de passe.
3) Q: Y a-t-il moyen d'utiliser mon répertoire personnel chiffré avec un autre
système d'exploitation que la Knoppix-MiB ?
R: Oui. Votre répertoire personnel est chiffré en utilisant loop-aes, que
l'on trouve en standard sur plusieurs distributions GNU/Linux (comme la
Mandrake).
Pour monter votre répertoire chiffré sur une telle distribution,
tapez (sous root) les instructions suivantes, après avoir créé avec
mkdir un répertoire pour le point de montage que vous désirez, par
exemple /home/moi/knophome, et monté votre support (comme /mnt/flashdisk
par exemple)
mount -t ext3 -o loop,encryption=AES256 /mnt/flashdisk/.knoppix.img /home/moi/knophome
(Pour démonter, tapez simplement: umount /home/moi/knophome )
Si votre distribution utilise cryptoapi plutôt que loop-aes, vous pouvez
monter votre répertoire chiffré comme ceci:
losetup -e aes -k 256 -p sha512 /dev/loop1 /mnt/flashdisk/.knoppix.img
mount -t ext3 /dev/loop1 /home/moi/knophome
(Pour démonter, tapez:
umount /home/moi/knophome
losetup -d /dev/loop1
)
La dernière version de cryptoapi utilise la syntaxe suivante:
losetup -e aes -k 256 -H sha512 /dev/loop1 /mnt/flashdisk/.knoppix.img
mount -t ext3 /dev/loop1 /home/me/knophome
et vous pouvez même monter votre répertoire chiffré en une seule étape,
en utilisant:
mount -t ext3 -o loop,encryption=aes,keybits=256,phash=sha512 /mnt/flashdisk/.knoppix.img /home/me/knophome
4) Q: J'ai oublié la phrase secrète qui permet l'accès à mon répertoire person-
nel chiffré. Comment puis-je récupérer mes données ?
R: Vous ne le pouvez pas. Si vous avez perdu votre phrase secrète, vous avez
également perdu vos données de manière irrémédiable, et il n'y a aucun
moyen de les récupérer. Si ça n'était pas le cas, le chiffrement qui
protège l'accès à votre répertoire personnel n'offrirait aucune sécurité.
5) Q: Comment puis-je changer la phrase secrète qui protège l'accès à mon
répertoire personnel chiffré ?
R: Vous ne le pouvez pas. Mais vous pouvez créer un nouveau répertoire
personnel utilisant une nouvelle phrase secrète, et recopier le contenu
de l'ancien dans le nouveau, comme expliqué à la question suivante.
6) Q: Mon répertoire personnel chiffré est plein. Puis-je l'agrandir ?
R: Non, vous ne pouvez pas l'agrandir, mais vous pouvez en créer un nouveau,
plus grand, et y recopier les données de l'ancien, en suivant les
instructions ci-dessous:
Je vais partir du principe que vous avez une partition de disque dur
/dev/hda1 en FAT32 Windows, et que votre home persistant est dans un
fichier .knoppix.img sur une clé USB vue comme /dev/sda1, laquelle est
à la base partitionnée en FAT Windows également (c'est le cas le plus
général). Si votre cas est différent, il faudra légèrement adapter ces
instructions.
1) Booter SANS monter le home chiffré, avec la clé USB insérée, mais en
bootant avec l'option:
knoppix home=none
2) Attribuer un mot de passe "root", comme indiqué à la rubrique corres-
pondante de cette FAQ
3) Ouvrir une console root (par exemple dans KDE)
4) Monter la partition du disque dur en lecture-écriture:
mount -t vfat /dev/hda1 /mnt/hda1
5) Monter la partition du FlashDisk en lecture-écriture:
mount -t vfat /dev/sda1 /mnt/sda1
6) Copier le fichier-container du home chiffré tel quel, sur le disque
dur, en l'appelant "knoppix-oldhome":
cp /mnt/sda1/.knoppix.img /mnt/hda1/knoppix-oldhome
7) Supprimer ce fichier du Flashdisk pour y "faire de la place":
rm /mnt/sda1/.knoppix.img
8) Créer un nouveau fichier-container sur le Flashdisk, de la taille
désirée (par exemple 40 Mo):
dd if=/dev/urandom of=/mnt/sda1/.knoppix.img bs=1M count=40
puis:
chown knoppix: /mnt/sda1/.knoppix.img
puis:
sync
9) Monter ce nouveau container sur un loop-device chiffré (Il faudra
fournir ici la phrase secrète, faire très attention car elle ne sera
tapée qu'une fois, sans écho et sans contrôle):
losetup -e AES256 /dev/loop5 /mnt/sda1/.knoppix.img
10) Créer un système de fichiers ext3 sur le loop-device chiffré
mke2fs -m 0 -j -L HOME /dev/loop5
puis:
sync
puis contrôler avec:
e2fsck -fv /dev/loop5
puis:
sync
11) Désactiver le loop-device
losetup -d /dev/loop5
12) Créer des points de montage qui vont servir à copier le contenu de
l'ancien home dans le nouveau:
mkdir -p /ramdisk/old/home
mkdir -p /ramdisk/new/home
13) Monter l'ancien container, et le nouveau:
mount -t ext3 -o ro,loop,encryption=AES256 /mnt/hda1/knoppix-oldhome /ramdisk/old/home
mount -t ext3 -o loop,encryption=AES256 /mnt/sda1/.knoppix.img /ramdisk/new/home
14) Copier tout le contenu de l'ancien home dans le nouveau:
cp -a /ramdisk/old/home /ramdisk/new/
puis:
sync
sync
15) Démonter les deux containers:
umount /ramdisk/old/home
umount /ramdisk/new/home
A partir de là, le transfert est achevé, vous pouvez rebooter et contrôler
que votre nouveau home chiffré de 40 Mo fonctionne correctement.
Une fois ceci fait et vérifié, vous pouvez supprimer l'ancien container
knoppix-oldhome qui est sur la partition hda1 du disque dur.
Un "effacement normal" est suffisant, ce container étant de toute manière
chiffré, mais si vous voulez le wiper complètement, vous pouvez faire
quelque chose comme:
mount -t vfat /dev/hda1 /mnt/hda1
losetup /mnt/hda1/knoppix-oldhome /dev/loop5
dd if=/dev/urandom of=/dev/loop5
(Il y aura à la fin une erreur "périphérique plein")
puis:
sync
losetup -d /dev/loop5
rm /mnt/hda1/knoppix-oldhome
umount /mnt/hda1
E) UTILISATION DU DISQUE DUR DE L'ORDINATEUR
--------------------------------------------
1) Q: Le fait d'essayer la Knoppix-MiB sur mon ordinateur risque-t-il d'en
affecter le fonctionnement, ou celui de mon système d'explotation
habituel ?
R: Non. A moins que vous ne le spécifiiez volontairement, et dans quelques
cas particuliers (voir questions suivantes), la Knoppix-MiB n'écrira rien
sur le disque dur de votre ordinateur et n'y effectuera aucune modifica-
tion. Dès que vous aurez retiré le CD-Rom Knoppix-MiB et rebooté votre
système, vous retrouverez votre système d'exploitation habituel dans
l'état exact où vous l'aviez laissé.
2) Q: Dans quels cas la Knoppix-MiB écrira-t-elle quelque chose sur le disque
dur de mon ordinateur sans rien me demander ?
R: Uniquement dans le cas où vous possédez déjà, sur votre disque dur, une
partition de type "GNU/Linux Swap" (type 82). Dans ce cas, la Knoppix-MiB
utilisera automatiquement cet espace de swap pour étendre la mémoire
virtuelle dont disposera Knoppix durant son fonctionnement. Cette
partition sera automatiquement chiffrée (cryptée) par Knoppix durant son
fonctionnement, et son contenu original sera écrasé, ce qui est absolument
sans conséquence, s'agissant d'une partition de swap.
3) Q: Y a-t-il une situation où la Knoppix-MiB pourrait endommager d'elle-même
les données ou systèmes de fichiers installés sur mon disque dur ?
R: Dans UN SEUL cas: Si votre disque dur est extrêmement MAL configuré, et
que vous avez dessus une partition dont le type est "82: GNU/Linux Swap", mais
que cette partition contient en fait un système de fichiers quelconque, ET
que la Knoppix est incapable de reconnaître ce système de fichiers. Dans
ce cas, la Knoppix-MiB pensera que cette partition est un swap GNU/Linux,
puisque son type l'indique, et utilisera cette partition en la chiffrant,
ce qui écrasera son contenu de manière irrémédiable.
Toutefois, un tel accident ne risque pas de se produire, sur aucun système
normalement configuré, à l'exception de ce cas extrêmement particulier.
(Je décline toute responsabilité pour les pertes de données pouvant surve-
nir en pareil cas, causé par une très importante erreur dans la configura-
tion de départ du disque dur de l'ordinateur).
4) Q: Est-il possible, en utilisant la Knoppix-MiB sur CD-Rom, d'accéder aux
données présentes sur le disque dur de l'ordinateur ?
R: Oui, mais uniquement si vous le spécifiez volontairement en "montant" les
partitions du disque dur de l'ordinateur. En effet, pour éviter toute
action accidentelle et malencontreuse sur le disque dur de l'ordinateur,
les partitions de celui-ci ne sont normalement pas "montées" par la
Knoppix-MiB, et ne sont donc pas accessibles.
Une partition de disque dur n'est montée automatiquement en lecture-
écriture par la Knoppix que si c'est nécessaire pour l'une des raisons
suivantes:
- La partition contient le fichier-image container d'un "répertoire
personnel persistant" que vous avez vous-même créé à cet endroit, et
qui doit donc être accessible.
- Il s'agit d'une partition DOS/Windows FAT/FAT32, et vous avez volontai-
rement créé sur celle-ci un "fichier d'échange" (ou fichier de swap).
Dans ce cas, comme dans le précédent, ce fichier doit être accessible
en lecture-écriture, et la partition correspondante est donc automati-
quement montée ainsi par la Knoppix-MiB.
Dans tous les autres cas, les partitions du disque dur ne seront pas
montées par défaut, à moins que vous ne le fassiez volontairement.
Si vous utilisez l'environnement de bureau par défaut "KDE", le fait de
cliquer sur une des icônes de bureau correspondant aux partitions de
disque, provoquera le montage de celle-ci en LECTURE SEULE, ainsi, vous
pourrez accéder aux fichiers que contient cette partition pour les lire,
mais vous ne pourrez pas les modifier (ici encore, dans le but d'éviter
les dommages possibles causés par une fausse manoeuvre).
Si vous désirez pouvoir écrire sur cette partition du disque dur, il
vous faudra faire un clic-droit sur l'icône qui la représente, et choisir
l'option "Change read/write mode". A partir de là, vous aurez plein accès
en lecture comme en écriture sur les fichiers que contient cette parti-
tion.
5) Q: Est-il possible d'installer définitivement la Knoppix-MiB sur le disque
dur de mon ordinateur, pour ne plus avoir besoin du CD-Rom, accélérer
l'exécution, et personnaliser la distribution (installer de nouveaux
programmes, etc...) ?
R: La Knoppix-MiB est basée sur la Knoppix originale, et, comme elle, peut
être installée sur le disque dur de votre ordinateur.
Toutefois, le projet Knoppix-MiB est spécialement orienté vers une
utilisation nomade avec le CD-Rom et sans installation. Je n'ai person-
nellement PAS TESTÉ l'installation sur disque dur de la Knoppix-MiB (et
serais très intéressé de recevoir des informations de votre part si vous
l'avez fait, pour pouvoir enrichir cette documentation).
De manière sommaire, pour installer la Knoppix-MiB sur votre disque dur,
il vous faut utiliser un script qui vous guidera dans les différentes
étapes de l'installation, vous fera créer sur votre disque dur les
partitions nécessaires, et procédera à l'installation.
Pour ce faire:
- Passez en console texte "root" avec la combinaison de touches:
[Ctrl]-[Alt]-[F1]
- Tapez [Entrée] pour obtenir un prompt de commande
- Puis lancez le script
knx-hdinstall
- Et suivez les instructions fournies.
Vous trouverez plus d'informations concernant l'installation de Knoppix
sur votre disque dur, sur la page
http://www.knoppixfr.org/index.php?page=installhd
F) PROBLEMES DE BOOT
--------------------
1) Q: Au boot, je vois s'afficher "Loading vmlinuz....." et "Loading
miniroot.gz....." puis mon écran s'éteint ou mon système se bloque...?
R1: Assurez-vous tout d'abord que ce n'est pas un simple problème d'affi-
chage, voyez la section correspondante de la FAQ.
R2: Un de vos périphériques intégrés, ou votre carte mère, est peut-être
incompatible avec les pilotes chargés automatiquement au démarrage de
Knoppix, ou avec le système d'auto-détection. Pour le savoir, essayez
de booter en tapant au prompt de boot:
failsafe
Si le système démarre alors, c'est qu'il y a bien un problème de cet
ordre.
Pour isoler précisément le problème, sachez que démarrer avec
failsafe
est équivalent à démarrer avec l'ensemble d'options:
knoppix vga=normal noapic noscsi nodma noapm nousb nopcmcia nofirewire
noagp nodhcp xmodule=vesa
Il est probable qu'une seule de ces options est nécessaire au démarrage
de votre machine. Essayer de déterminer laquelle en bootant successive-
ment avec diverses options, comme par exemple:
knoppix noapic
puis
knoppix noscsi
puis
knoppix noagp
...etc, jusqu'à ce que vous ayiez trouvé la "bonne option". Si une seule
option ne suffit pas, il est peut-être nécessaire d'en combiner deux ou
trois. Vous pouvez dans ce cas procéder dans l'ordre inverse, en bootant
d'abord avec toutes les options, puis en les supprimant une par une
jusqu'à ce que vous découvriez des options dont la suppression empêche à
nouveau votre système de booter.
2) Q: Au boot, j'ai un message "ERROR: Only one processor found" ...?
R: Ce message est sans importance et n'affecte en rien le fonctionnement.
Le noyau Knoppix est capable de gérer des systèmes multi-processeur, mais
peut dans certains cas croire par erreur que l'architecture de votre
système est multiprocesseur (notamment sur les architectures AMD), alors
qu'il ne trouve en fait qu'un seul processeur, d'où ce message.
Ignorez-le simplement ;-)
G) RESEAU LOCAL
---------------
1) Q: Puis-je voir depuis la Knoppix-MiB les fichiers présents dans des "dos-
siers partagés de machines Windows sur le même réseau local ?
R: Oui. L'outil le plus simple pour cela est "LinNeighborhood", que vous
trouverez dans le menu "K / Internet".
Avec cet outil, vous pouvez voir et monter les dossiers partagés par des
machines Windows, et après les avoir montés, vous pouvez ouvrir un
gestionnaire de fichiers (comme Konqueror) pour pouvoir travailler direc-
tement dessus.
H) FRANCISATION
---------------
1) Q: Comment utiliser les dictionnaires "Drayer" français pour OpenOffice ?
R: Ouvrir OpenOffice, Aller dans "Outils/Options", Puis choisir "Paramètres
linguistiques" et:
- Choisir l'environnement linguistique français, et le français comme
langue par défaut pour les documents
- Passer dans la section "Linguistique" cliquer sur le bouton "Editer"
des "Modules delangues disponibles", et cocher pour la langue française
les cases "OpenOffice.org MySpell SpellChecker" et "ALTGNU/Linux LibHnj
Hyphenator".
- Puis valider.
- Ces modifications seront conservées si vous utilisez un répertoire
personnel persistant.
2) Q: Comment obtenir Mozilla et Enigmail en français ?
R: Ouvrir Mozilla, aller dans "Edit / Preferences", puis "Appearance /
Language/Content" et sélectionner le "language pack" français, et le
"Content pack" français, puis valider.
- Il peut être nécessaire de fermer puis redémarrer Mozilla pour que les
changements soient pris en compte.
- Ces modifications seront conservées si vous utilisez un répertoire
personnel persistant.
Vous trouverez la version la plus récente de ce présent document à l'adresse:
http://www.bouissou.net/knoppix-mib/README-MiB
J'espère que cette version de la Knoppix-MiB "Privacy Edition" vous sera utile
et que vous l'apprécierez !
Michel Bouissou
===============================================================================
===============================================================================
===============================================================================
LIST OF ADDED / CHANGED FILES:
==============================
- KNOPPIX Directory on the CD-Rom:
----------------------------------
- README-MiB: This documentation file
- README-MiB.sig: GnuPG detached signature for this file
- mib.pub.key.asc: My GnuPG public key
- index.html: Customized
- boot.img (System boot image): Syslinux config modified, french translation
- KNOPPIX Compressed loopback filesystem (visible once Knoppix is running):
---------------------------------------------------------------------------
/KNOPPIX/etc/init.d:
knoppix-autoconfig: Knoppix startup autoconfiguration script
knoppix-halt: System halt script
knoppix-reboot: System reboot script
/KNOPPIX/usr/sbin:
mkpersistenthome: Script for creating the home directory
mkdosswapfile: Script for creating an encrypted swap file on a FAT/FAT32 part
rebuildfstab: Script for creating the /etc/fstab file
scanpartitions: Script for exploring system partitions and determining types
saveconfig: Script for saving Knoppix configuration
mkxf86config: Script for configuring X11
/KNOPPIX/usr/share/applnk/Knoppix/Config:
mkdosswapfile.desktop: Menu shortcut
mkpersistenthome.desktop: Menu shortcut
saveconfig.desktop: Menu shortcut
cupsconfig.desktop: Menu shortcut
soundcardconfig.desktop: Menu shortcut
/KNOPPIX/usr/share/applnk/Knoppix/Net:
netcardconfig.desktop: Menu shortcut
/KNOPPIX/etc/skel/.kde/share/config and /KNOPPIX/etc/skel/Desktop:
Several KDE configuration/customisation files
Doc-MiB.desktop: Desktop shortcut to this document
- DEBIAN Packages
-----------------
- Many packages upgraded with apt-get (see at end)
- gnuchess-book 11.7MB (Openings book for GnuChess)
- ifrench-gut 5714kB (French Gutemberg project dictionary)
- postfix MTA
- postfix-tls support (with TLS configuration)
- libsasl2 (Used by Postfix)
- manpages-fr 3219kB
- openoffice.org-l10n-fr 151M (French OpenOffice localization)
- openoffice.org-l10n-en 5669kB (English OpenOffice localization)
- Added KGPG Package (custom compiled to satisfy dependancies)
- XOSview
- gkrellm + misc modules
- mkcryptfs
- REMOVED DEBIAN Packages (So the ISO now fits on a 650 MB CD-ROM)
=========---------------------------------------------------------
- abiword-common 2404kB (Abiword completely removed)
- abiword-gtk 4260kB
- apache 770kB (Apache web server completely removed)
- apache-common 2810kB
- bb
- glibc-doc 8155kB (Who needs 8 MB of libc docs on such a CD-Rom ? ;-)
- gnumeric 11.1M (Spreadsheet. Use OpenOffice instead)
- gpa 594k (GNU Privacy Assistant. Use KGPG instead)
- ingerman 2420kB
- kdevelop 9671K (Uh, this CD is not maily aimed at being a development platform)
- kde-i18n-cs 5337kB (Many localizations took too much place, sorry)
- kde-i18n-da 15.7MB
- kde-i18n-de 20.1MB
- kde-i18n-es 15.8MB
- kde-i18n-it 12.8MB
- kde-i18n-ja 6402kB
- kde-i18n-nl 7500kB
- kde-i18n-pl 4444kB
- kde-i18n-ru 9929kB
- kde-i18n-tr 4559kB
- koffice-i18n-de 762kB
- libapache-mod-ssl 705kB
- lyx 17.3MB
- manpages-de 881kB
- mozilla-locale-de-at 1225kB
- mysql-server
- openoffice-de-en 210M
- php4 1454kB
- qcad 14.9MB (CAD tool)
- selflinux 12.6MBA (Huge german documentation)
- sodipodi 3088kB (Drawing tool)
- smail (replaced by Postfix)
- thttpd 221kB
- tipptrainer-data-de 942kB (German / English typing course)
- tipptrainer-data-en 831kB
- tipptrainer
- trans-de-en 4936kB (english/german dictionary)
- Non-Debian additions
----------------------
- Generic TLS certificates for Postfix
- Enigmail for Mozilla
- Drayer french dictionaries for OpenOffice
- Debian upgraded packages
--------------------------
Many, upgraded with apt-get on 2003/04/20
_______________________________________________________________________________
CHANGELOG:
==========
knoppix-3.2-MiB-11b.iso 22/05/2003
- Fixed stupid bug that prevented X11 to start on most systems, Ooops :-(
knoppix-3.2-MiB-11.iso 21/05/2003
- Integrated latest Knoppix-specific improvements from
KNOPPIX_V3.2-2003-05-16-EN.iso
- Added gkrellm (+ modules) and xosview
- KGPG doesn't autostart anymore
- gkrellm autostarts
- New CD integrity verification system
- New "alsa" boot option for using ALSA sound drivers
- Numerous packages upgrades
- XFree 4.3
- OpenOffice 1.0.3
- Added qtparted
- Mozilla and Enigmail: Added French translations
- Updated knoppix-cheatcodes.txt
- Updated README-MiB (this file) and added a FAQ section
- Now features an HTML version of README-MiB (thanks goes to PPLF)
knoppix-3.2-MiB-10.iso 18/04/2002
- Boot screen now has both french and english help screens
- knoppix-autoconfig: Minor bugfix with loading saved configuration from
floppy when a persistent home directory is used
- mkpersistenthome: Minor bugfix with progress gauge that wasn't properly
removed in some cases when the container file had been created.
Improved some messages and prompts.
- saveconfig: Improved some messages and prompts.
- scanpartitions: DO NOT RELY ANYMORE on the "file" test to determine that
a partition is "swap", as it has been reported and confirmed that, on one
machine, an ext2 partition was incorrectly reported as "swap" by this test,
both with standard Knoppix-3.2 and Knoppix-3.2-MiB. Now we rely only on
the partition type "82=GNU/Linux Swap" for determining that a given partition
is swap.
- mkxf86config: Introduced 2 new optional boot parameters:
- knoppix maxhsync=
- knoppix oldscreen
that can help with some old monitors that don't report their capabilities
with DDC, and don't handle usual Knoppix HorizSync defaults.
- Completed documentation (this document)
- Now describes Knoppix-MiB specific boot parameters in knoppix-cheatcodes.txt
knoppix-3.2-MiB-9.iso 15/04/2003
- Changes affecting boot screen only
- Boot screen displays Knoppix-MiB version
- Boot help screen translated into french
- French AZERTY keyboard layout at boot prompt
knoppix-3.2-MiB-8.iso 09/04/2003
- Reworked saveconfig script, some important changes
- Cleanup of mkpersistenthome script, and improved progress gauges
- French translation of netcardconfig script
- French translation of a couple more KNOPPIX/Config menu entries
- Removed broken xcdroast menu entry (xcdroast is not installed)
- Customized index.html welcome screen
knoppix-3.2-MiB-7.iso 06/04/2003
- Fixed a bug in knoppix-autoconfig, that prevented swap partitions to be
mounted in many cases.
knoppix-3.2-MiB-6.iso 06/04/2003
- Reinstalled Dillo browser
- Installed AIDE
- Fixed little bug for french translation in knoppix-autoconfig
- Modified scanpartitions to make it a little more cautious before
determining a partition is "GNU/Linux Swap"
- Fixed some french menus localizations
- Some updates in this README file
- Added the "gpl.txt" GPL licence file in the CD-ROM KNOPPIX directory
knoppix-3.2-MiB-5.iso 31/03/2003
- Completely re-made on Knoppix 3.2 basis. Many scripts rewritten.
knoppix-3.1-MiB-3.iso 16/03/2003:
- Some more scripts and menus french translations
- Fixed broken kicker OpenOffice icon
- Shortcut to this document on desktop
- KDE aspect customisation
knoppix-3.1-MiB-2.iso 15/03/2003:
- Fixed a bug in preknoppix.sh
_______________________________________________________________________________
CREDITS AND THANKS
==================
My grateful thanks to:
- PPLF, for having tested and supported my work on Knoppix-MiB since the
beginning of this project, and having tested all the versions, given valuable
feedback and suggestions, and converted this README document to HTML.
- Yves Combes, for having given precious advice on the Debian packaging system
which I don't know that well myself ;-) and having built custom "MiB" .deb
packages from my modified scripts.
- Klaus Knopper, author of the original Knoppix distribution without which this
work wouldn't have existed in the first place ;-)
Thanks Klaus for this wonderful artpiece.
- The Debian Team, without which the Debian wouldn't have existed, and thus the
Knoppix...
- The KDE team, for the excellent KDE environment that easily beats competiting
commercial software such as well, you know...
- The GNU/Linux Kernel team, without which the GNU/Linux Kernel wouldn't be at the point
where it is today.
- GNU/Linux Torvalds, whithout whom "GNU/Linux" wouldn't exist at all ;-)
- Richard M. Stallman and the Free Software Foundation and GNU project, for all
the wonderful set of GNU Unix tools, gcc compiler, C libraries, etc., without
which GNU/Linux would barely be a kernel without much else ;-)
- And all the folks worldwide who spend their time writing and improving Free
Software. My deepest appreciation goes to all of you.
_______________________________________________________________________________
LICENSE DETAILS
===============
This program is free software; you can redistribute it and/or
modify it under the terms of the GNU General Public License
as published by the Free Software Foundation; either version 2
of the License, or (at your option) any later version.
This program is distributed in the hope that it will be useful,
but WITHOUT ANY WARRANTY; without even the implied warranty of
MERCHANTABILITY or FITNESS FOR A PARTICULAR PURPOSE. See the
GNU General Public License for more details.
You should have received a copy of the GNU General Public License
along with this program; if not, write to the Free Software
Foundation, Inc., 59 Temple Place - Suite 330, Boston, MA 02111-1307, USA.
Ce logiciel est un logiciel libre; vous pouvez le redistribuer et/ou le
modifier en accord avec les termes de la GNU General Public License
publiée par la Free Software Foundation, en utilisant soit la version 2
de cette licence, ou, à votre choix, toute version ultérieure.
Ce programme est distribué dans l'espoir qu'il sera utile, mais SANS AUCUNE
GARANTIE; sans même aucune garantie implicite de COMMERCIALISATION ou
D'ADÉQUATION À UN BESOIN PARTICULIER. Voir la lincece GNU GPL pour plus de
détails.
Vous devez avoir reçu un exemplaire de la licence GNU GPL avec ce programme.
Si ce n'est pas le cas, veuillez écrire à la Free Software Foundation, Inc.,
59 Temple Place - Suite 330, Boston, MA 02111-1307, USA.
*** END OF DOCUMENT ***
Et maintenant, un petit cadeau pour les spammeurs dont les robots scannent les sites web à la recherche d'adresses e-mail.